iPhone/iPadアプリ「Microsoft Authenticator」にMicrosoftアカウントを追加する方法を紹介します。
アプリ「Microsoft Authenticator」を使えば、パスワードなしで安全・簡単にサインインすることができます。
アプリ「Microsoft Authenticator」 - Microsoftアカウントの追加
それでは実際にMicrosoftアカウントを追加しましょう。
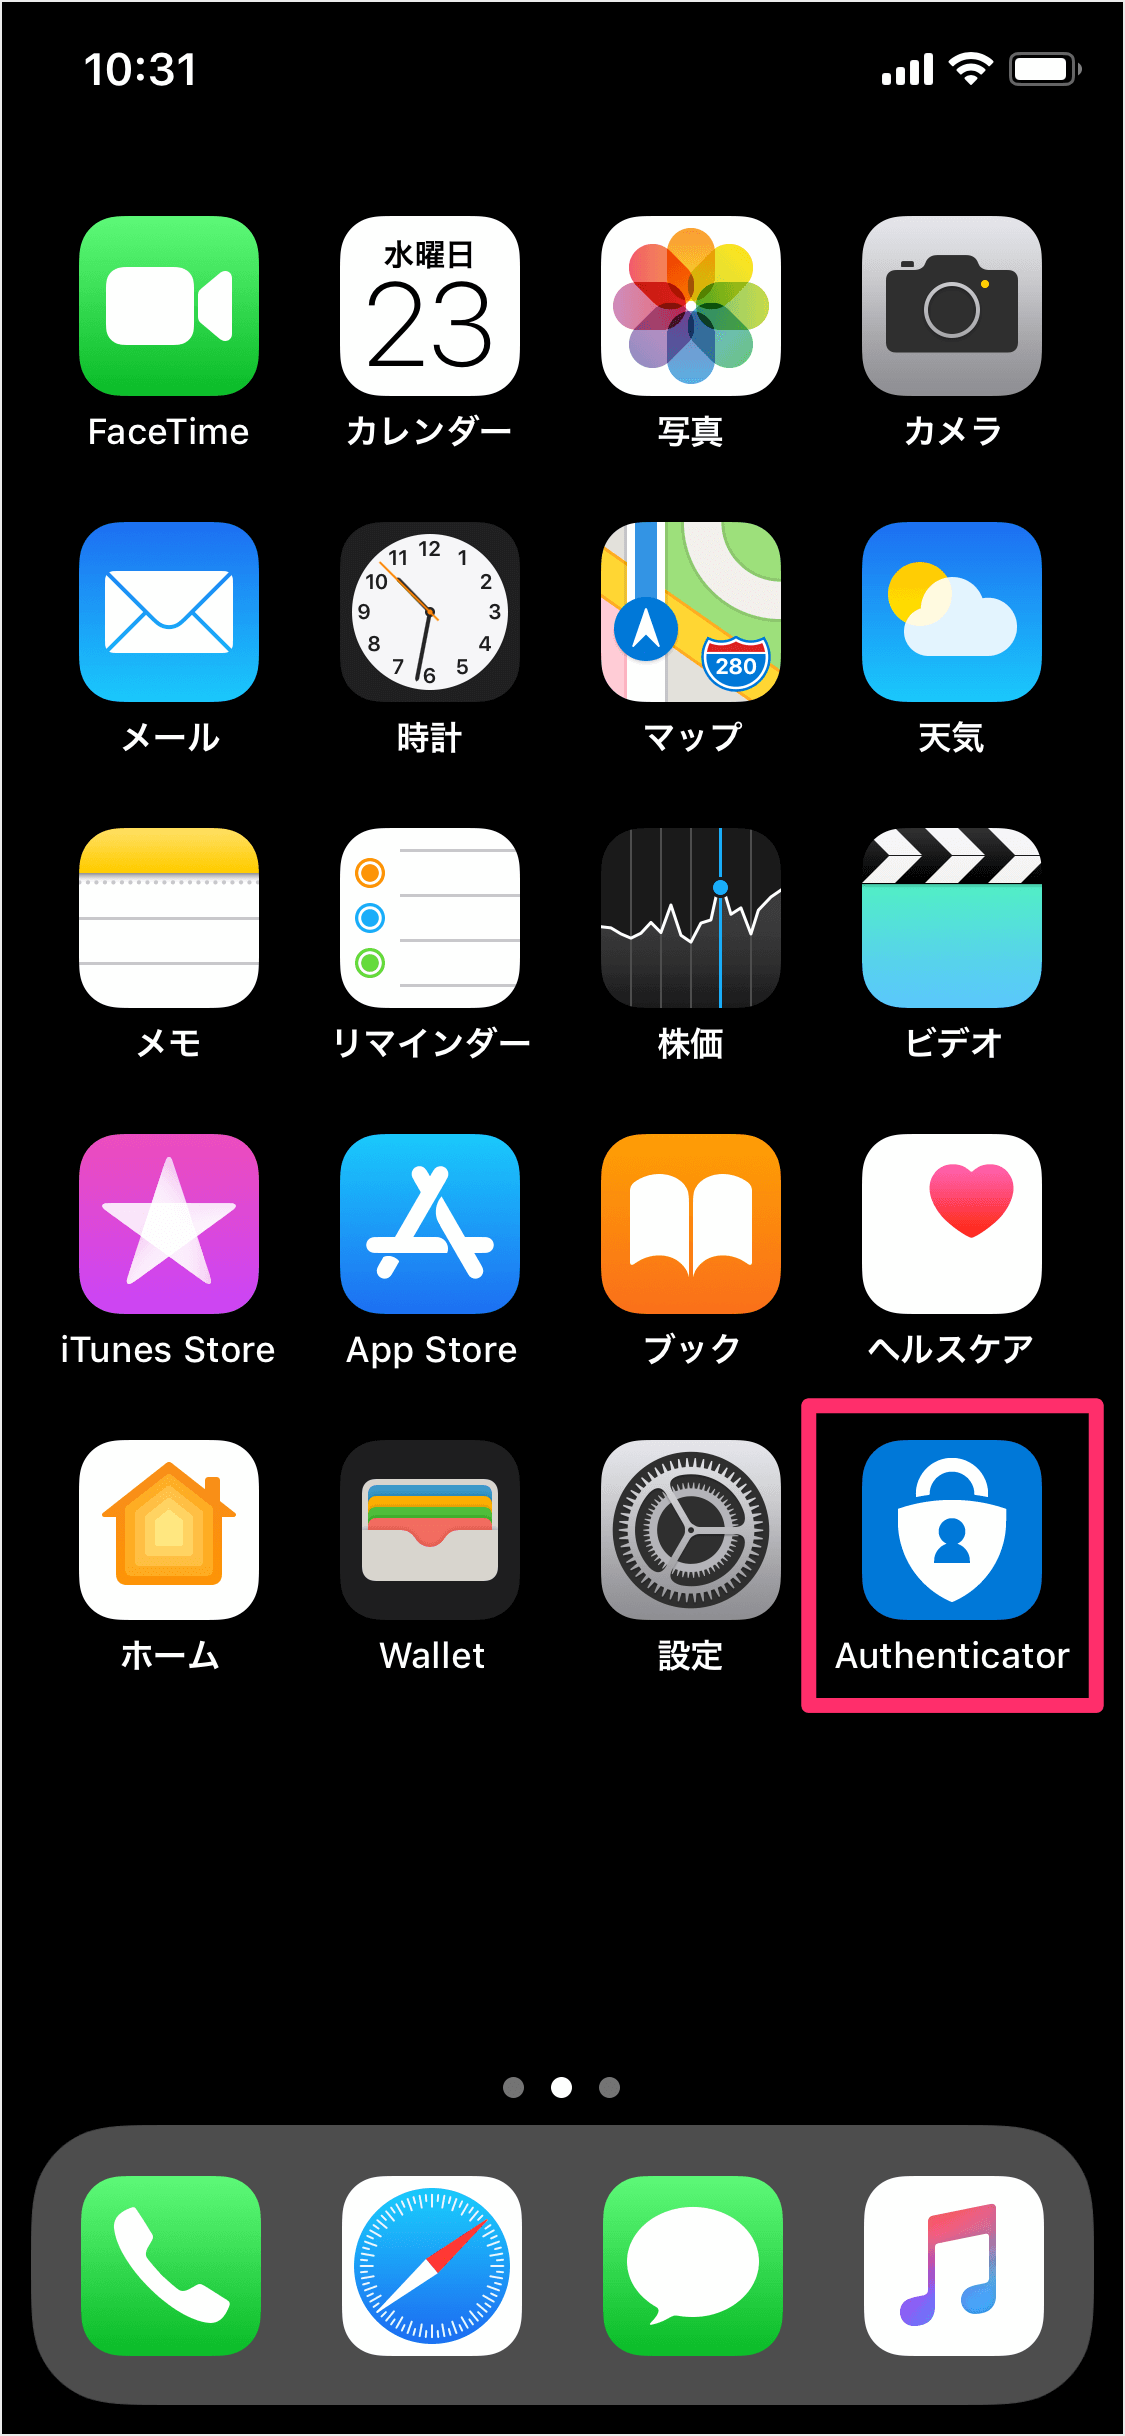
ホーム画面のアプリ「Microsoft Authenticator」を起動します。
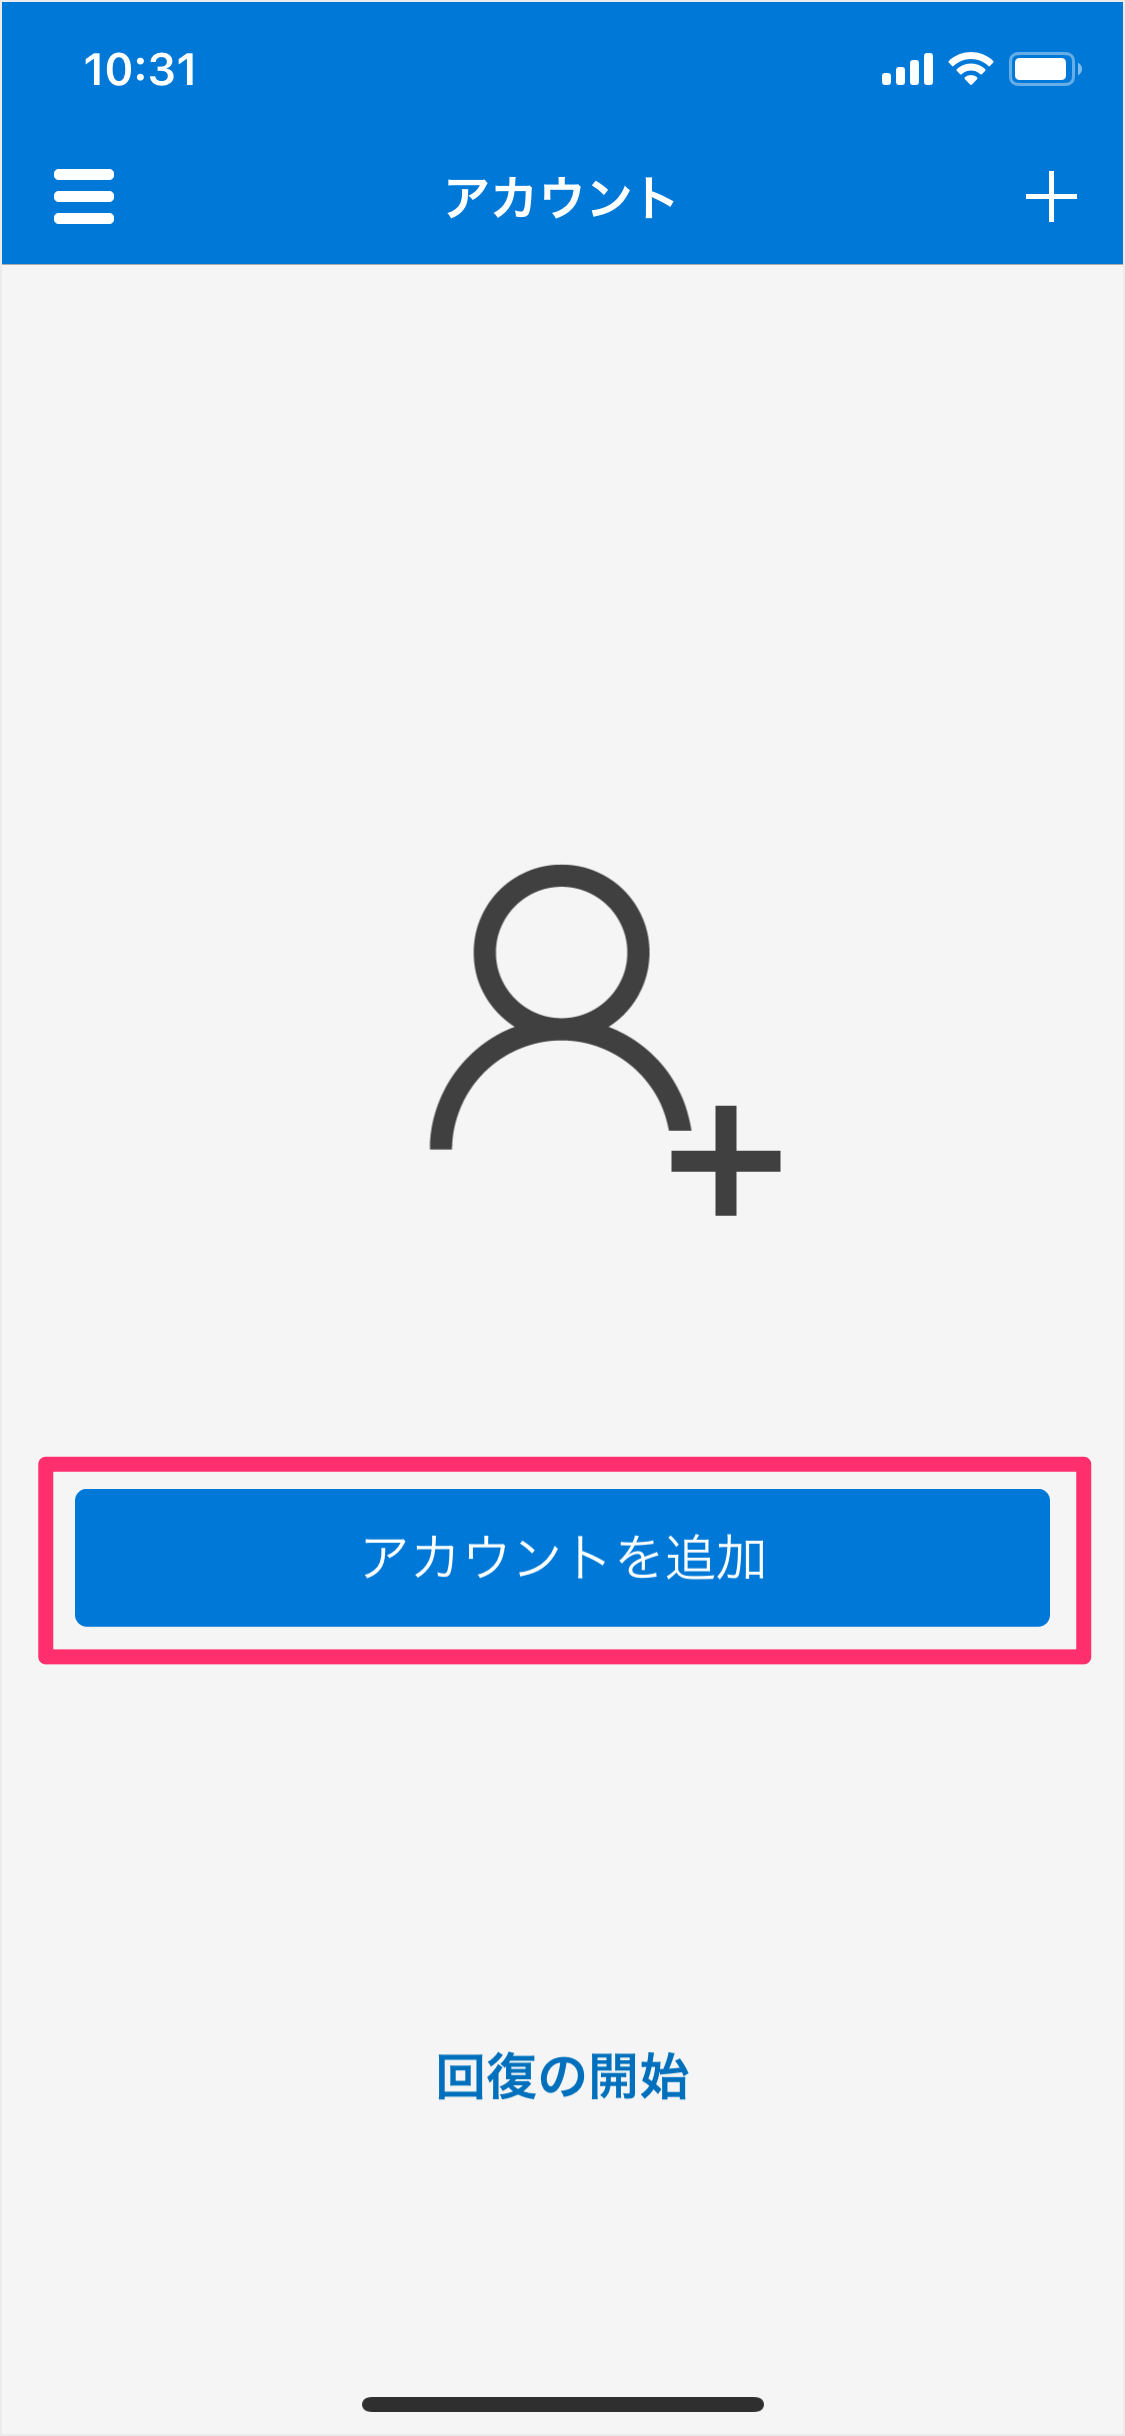
「アカウントを追加」をタップします。
あるいは、画面右上の「+」をタップします。
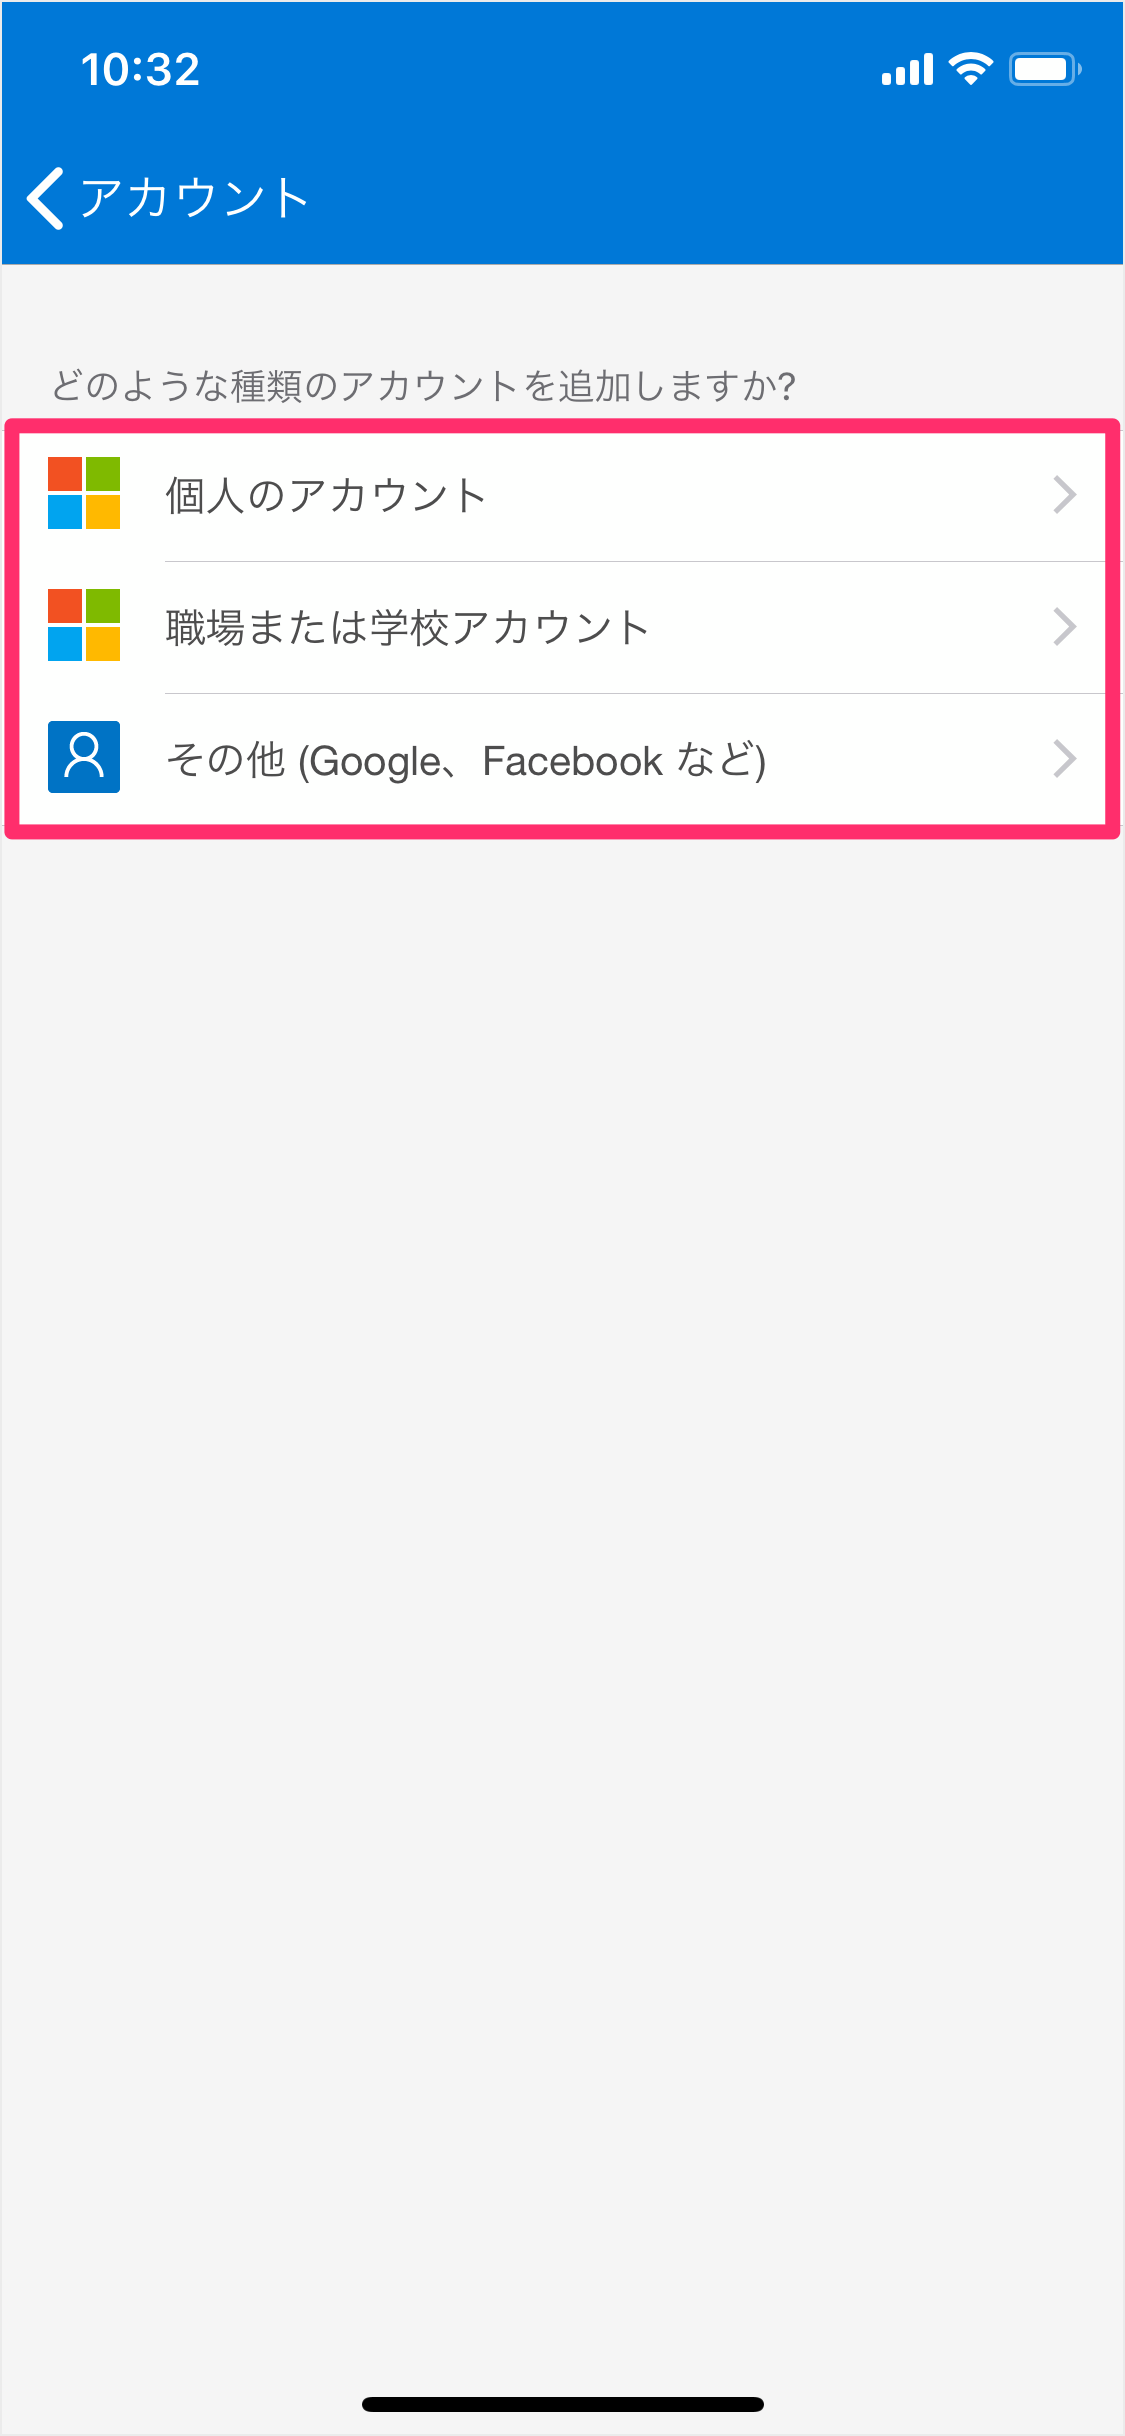
どのような種類のアカウントを追加しますか?
- 個人のアカウント
- 職場または学校アカウント
- その他(Google、Facebookなど)

ここでは「Microsoftアカウント(個人のアカウント)」を追加するので
「個人のアカウント」をタップしています。
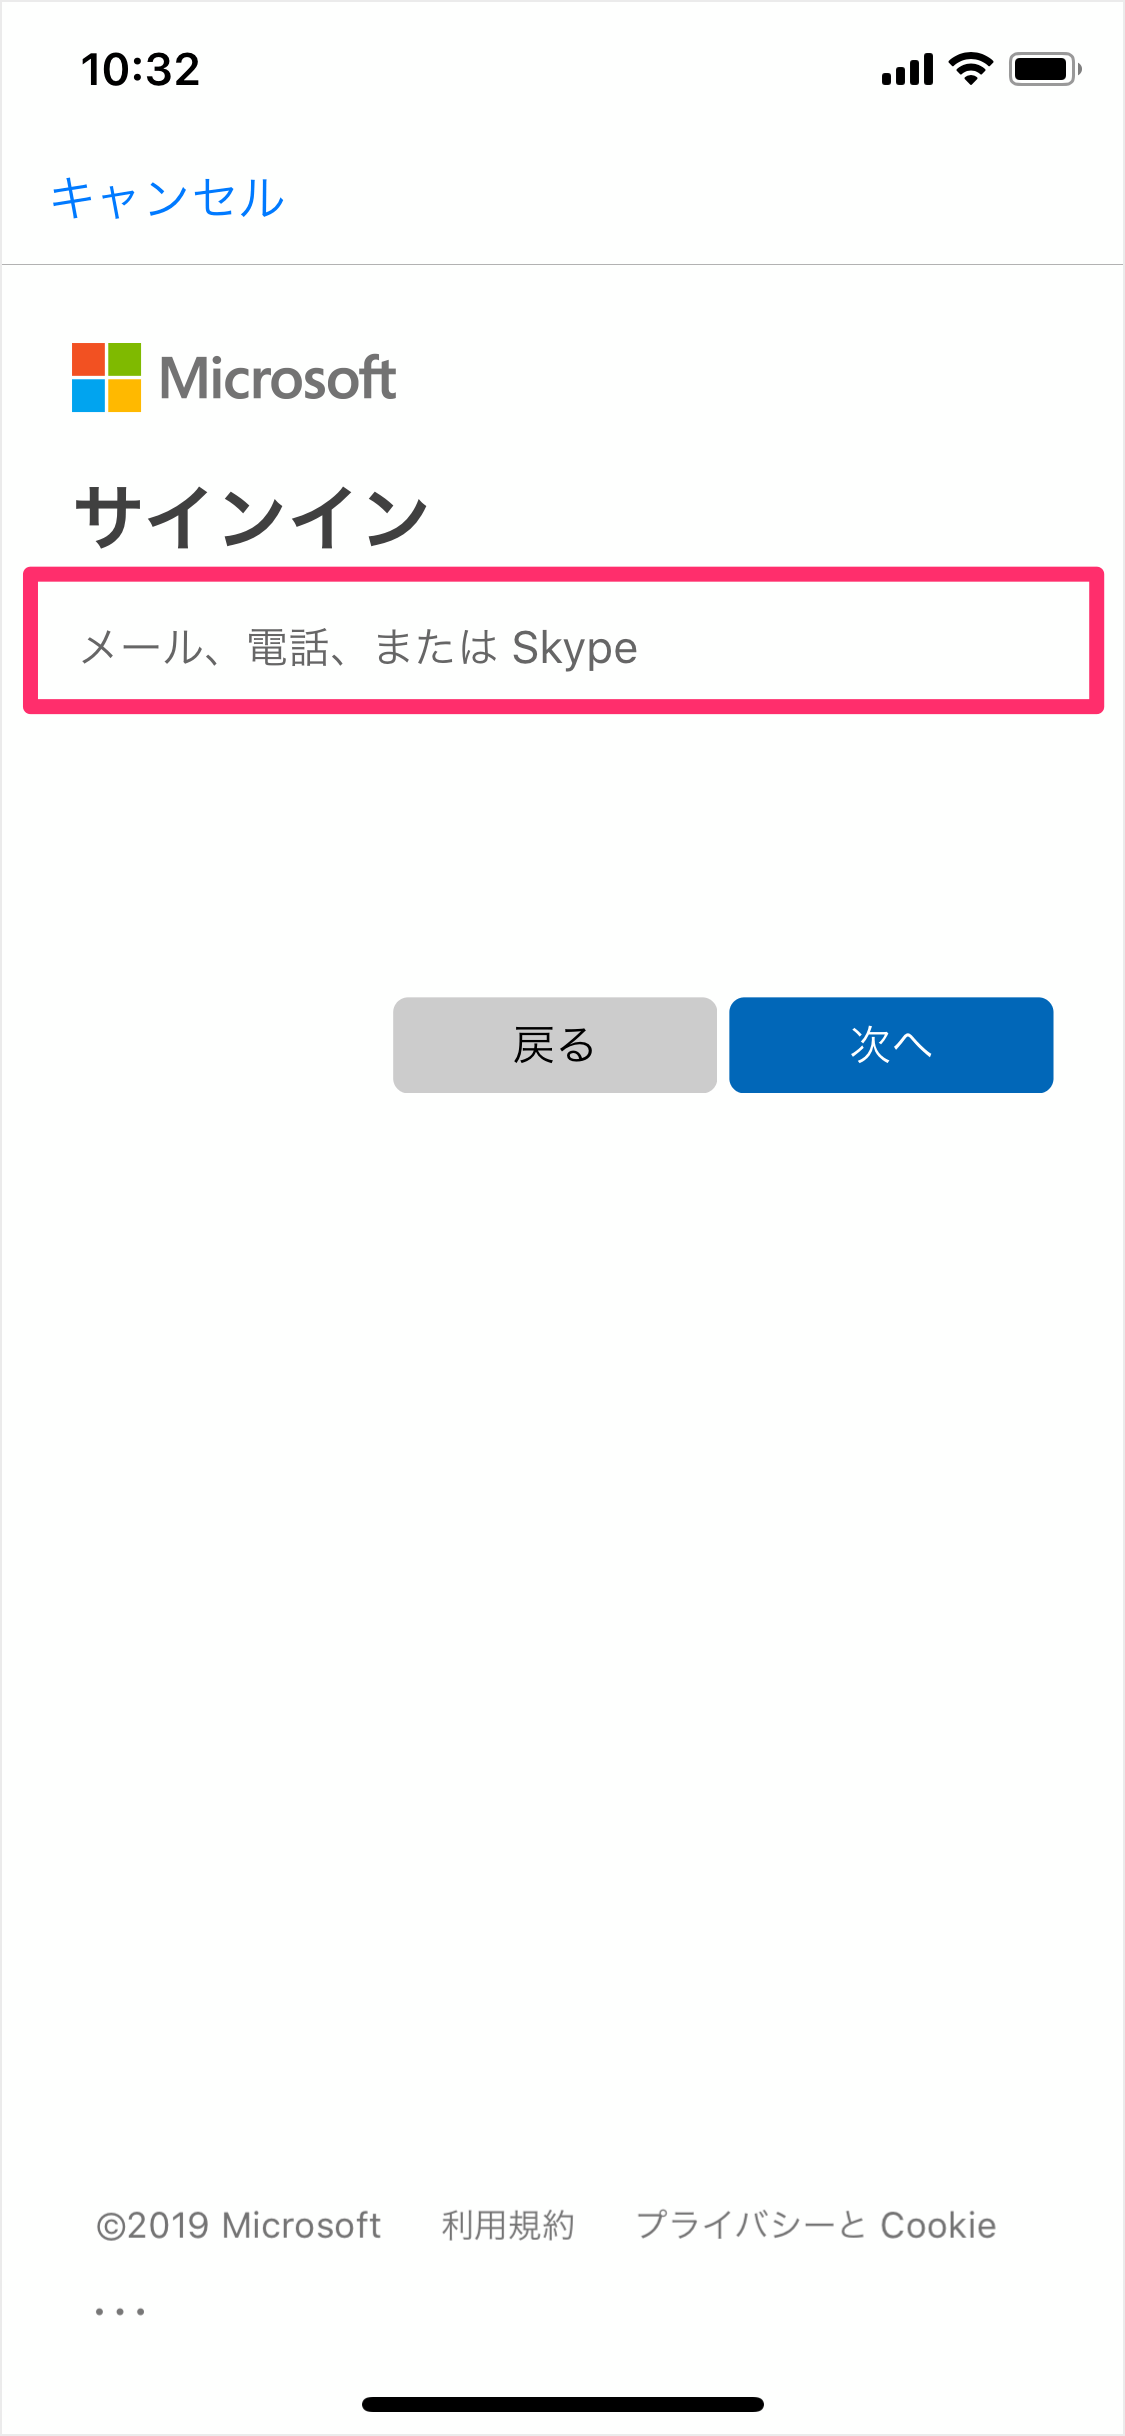
Microsoftアカウントのサインイン画面です。
- メール、電話、または Skype
を入力し、「次へ」をタップします。
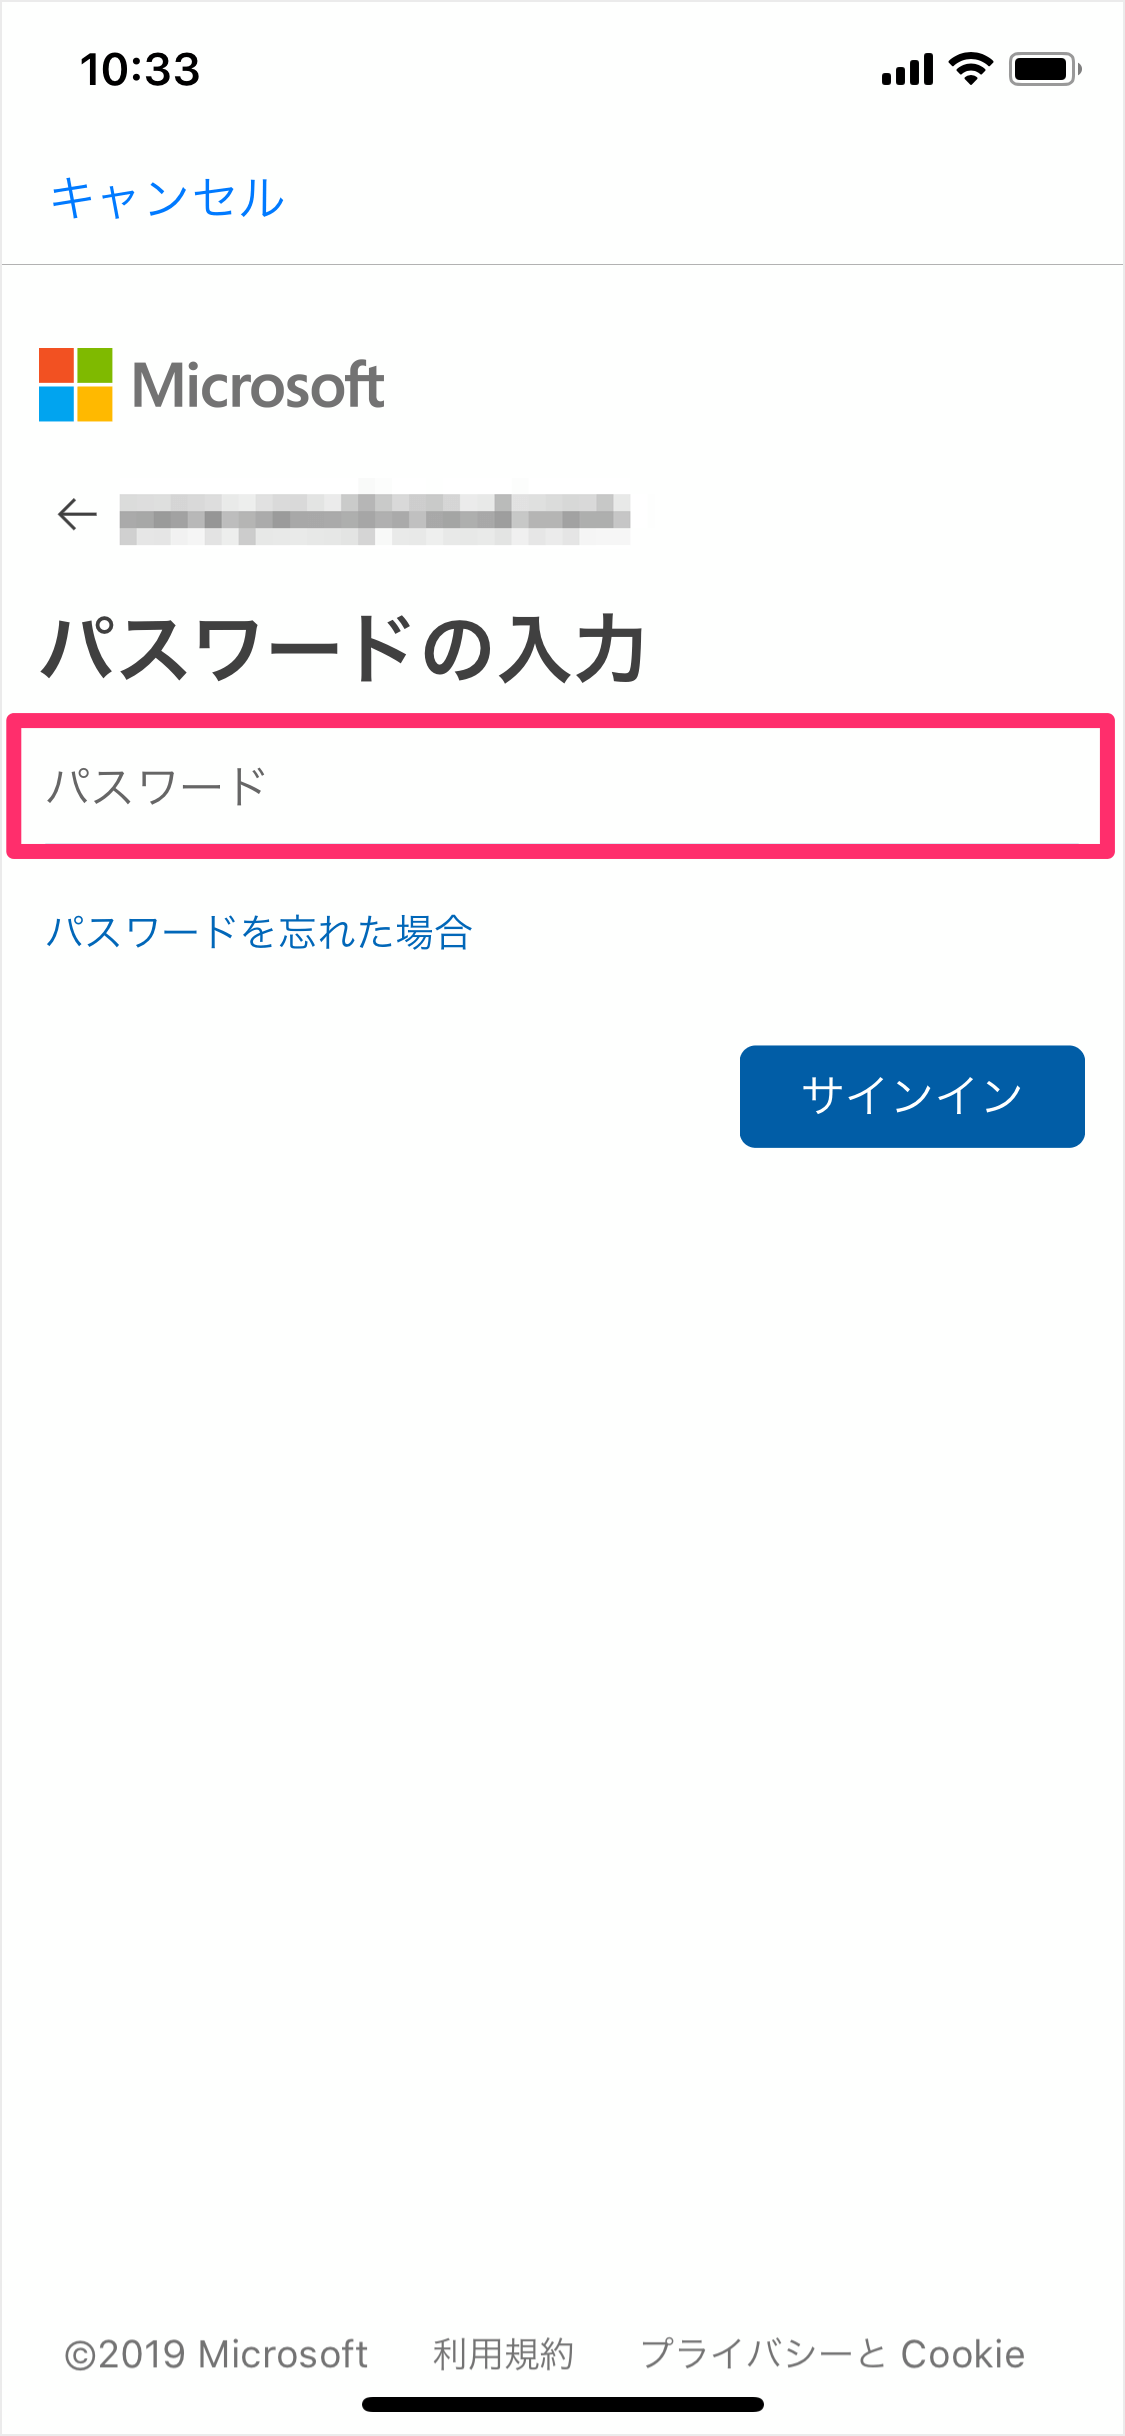
「パスワード」を入力し、「サインイン」をタップします。
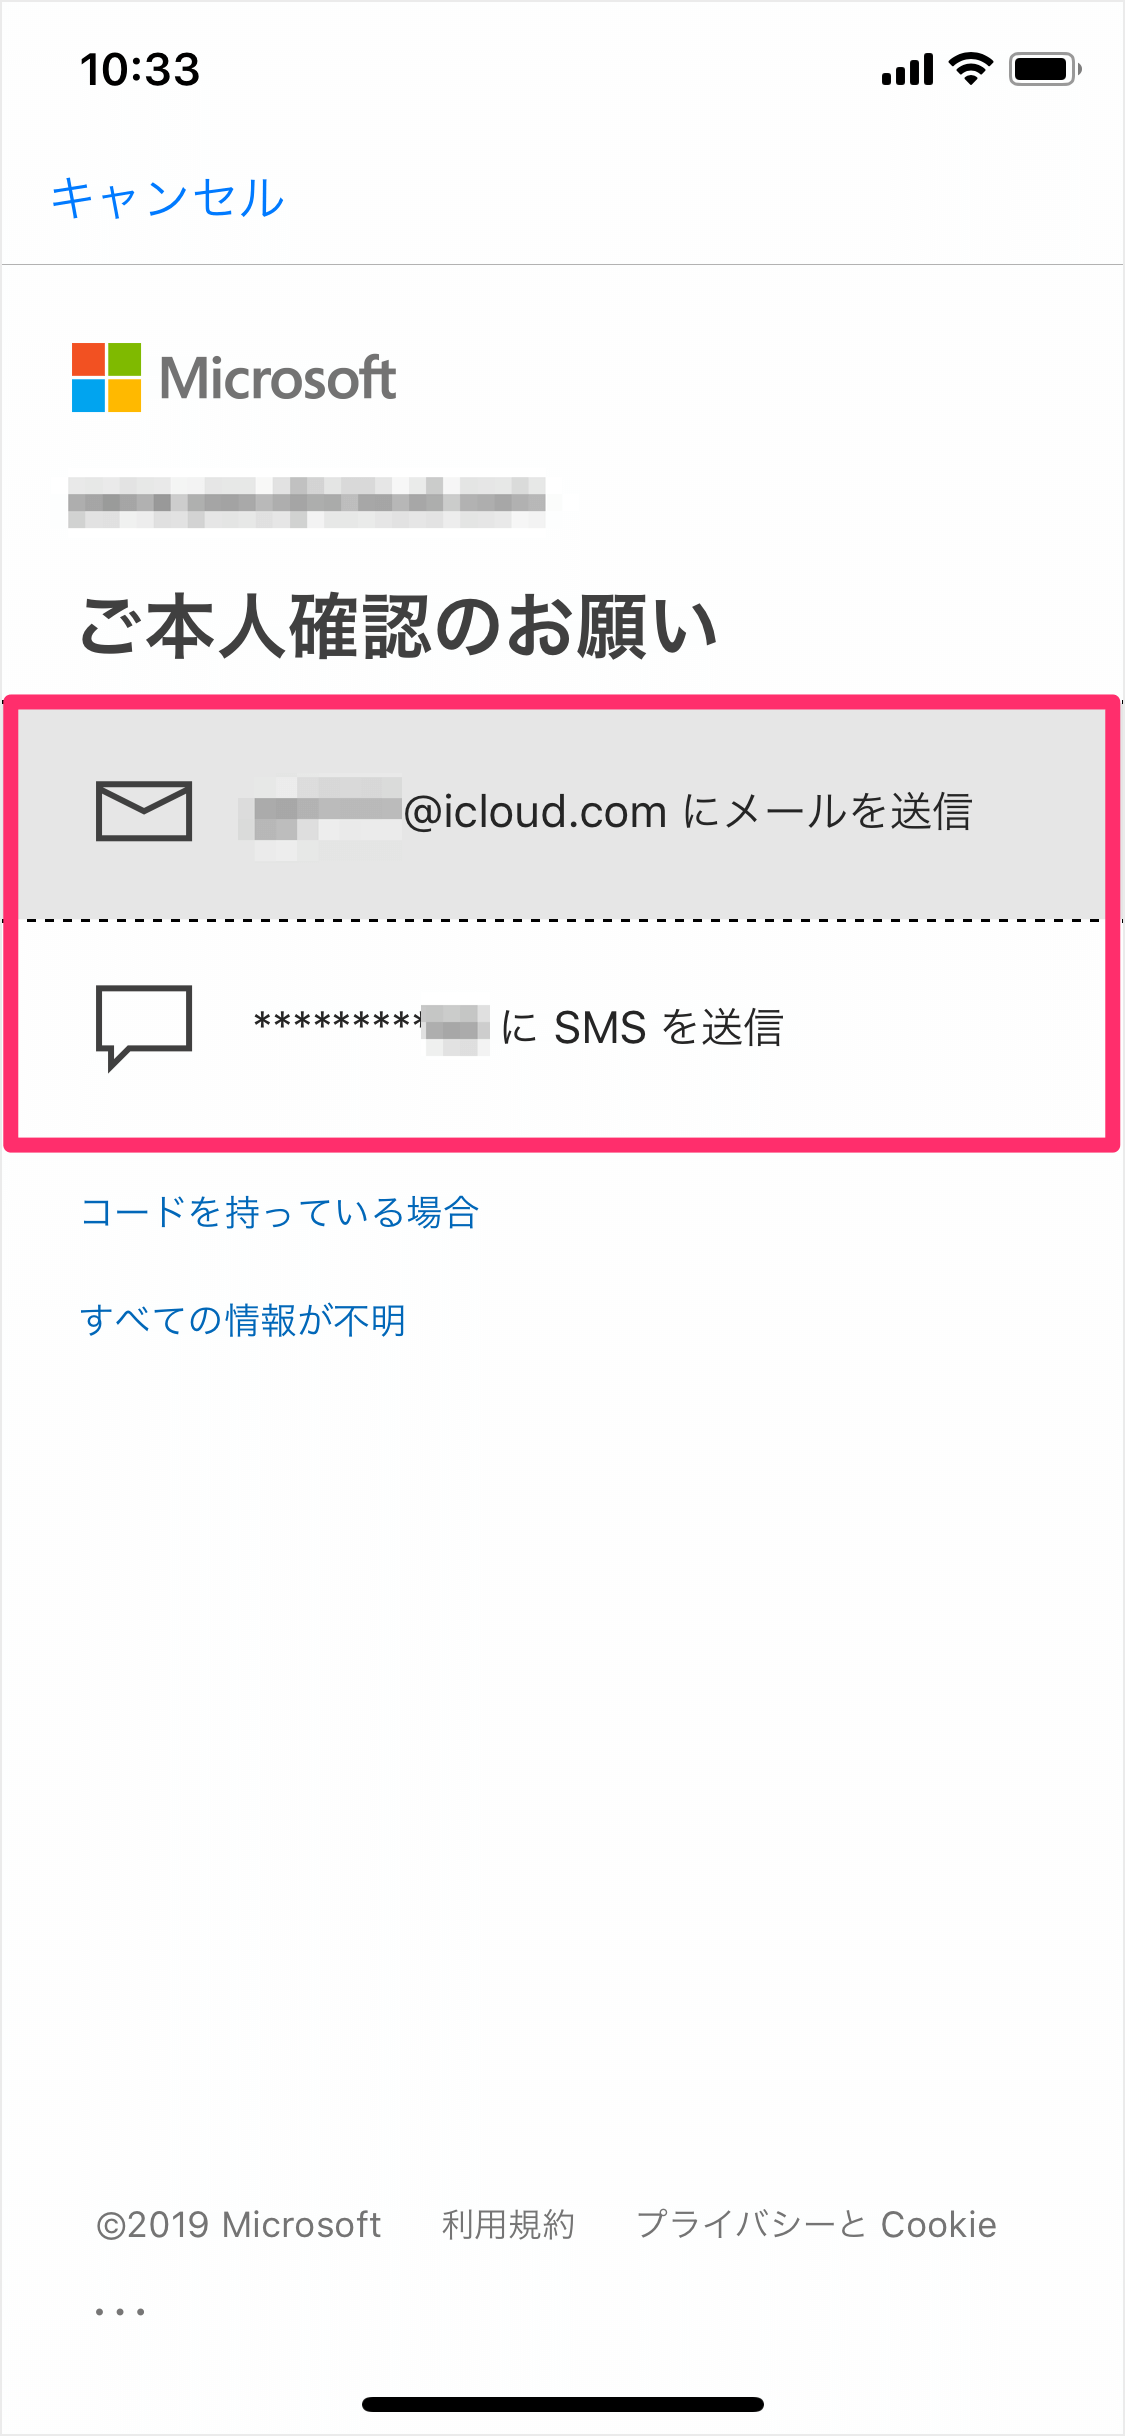
「本人確認のお願い」です。
- (登録しているメールアドレス)にメール送信
- (登録している携帯電話)にSMSを送信
のどちらかをタップしましょう。
ここでは「メール送信」をタップしました。
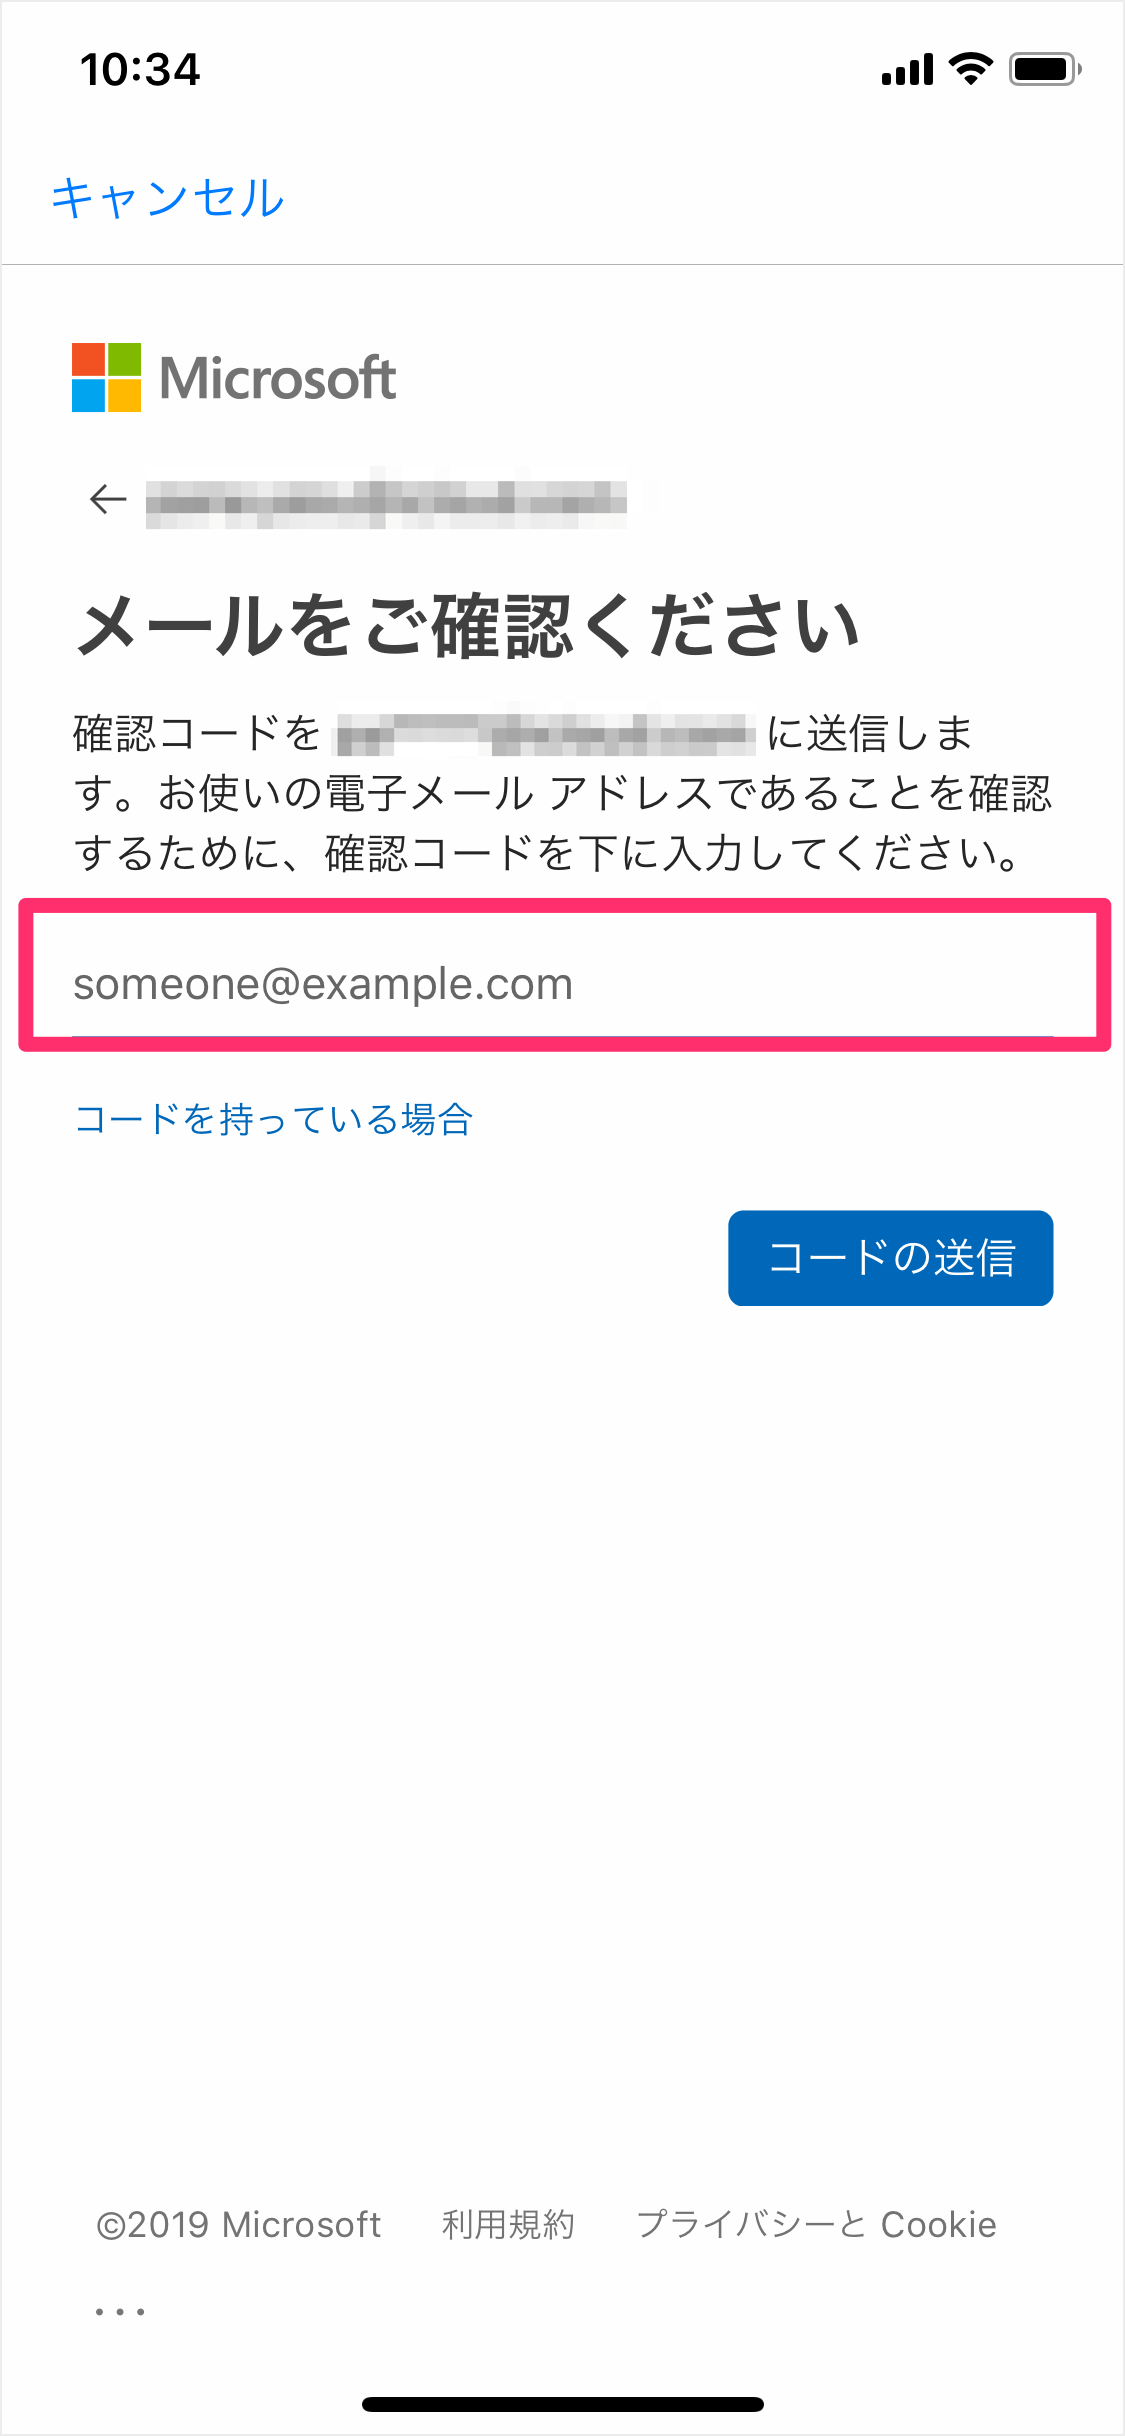
登録しているメールアドレスを入力し、「コードの送信」をタップします。
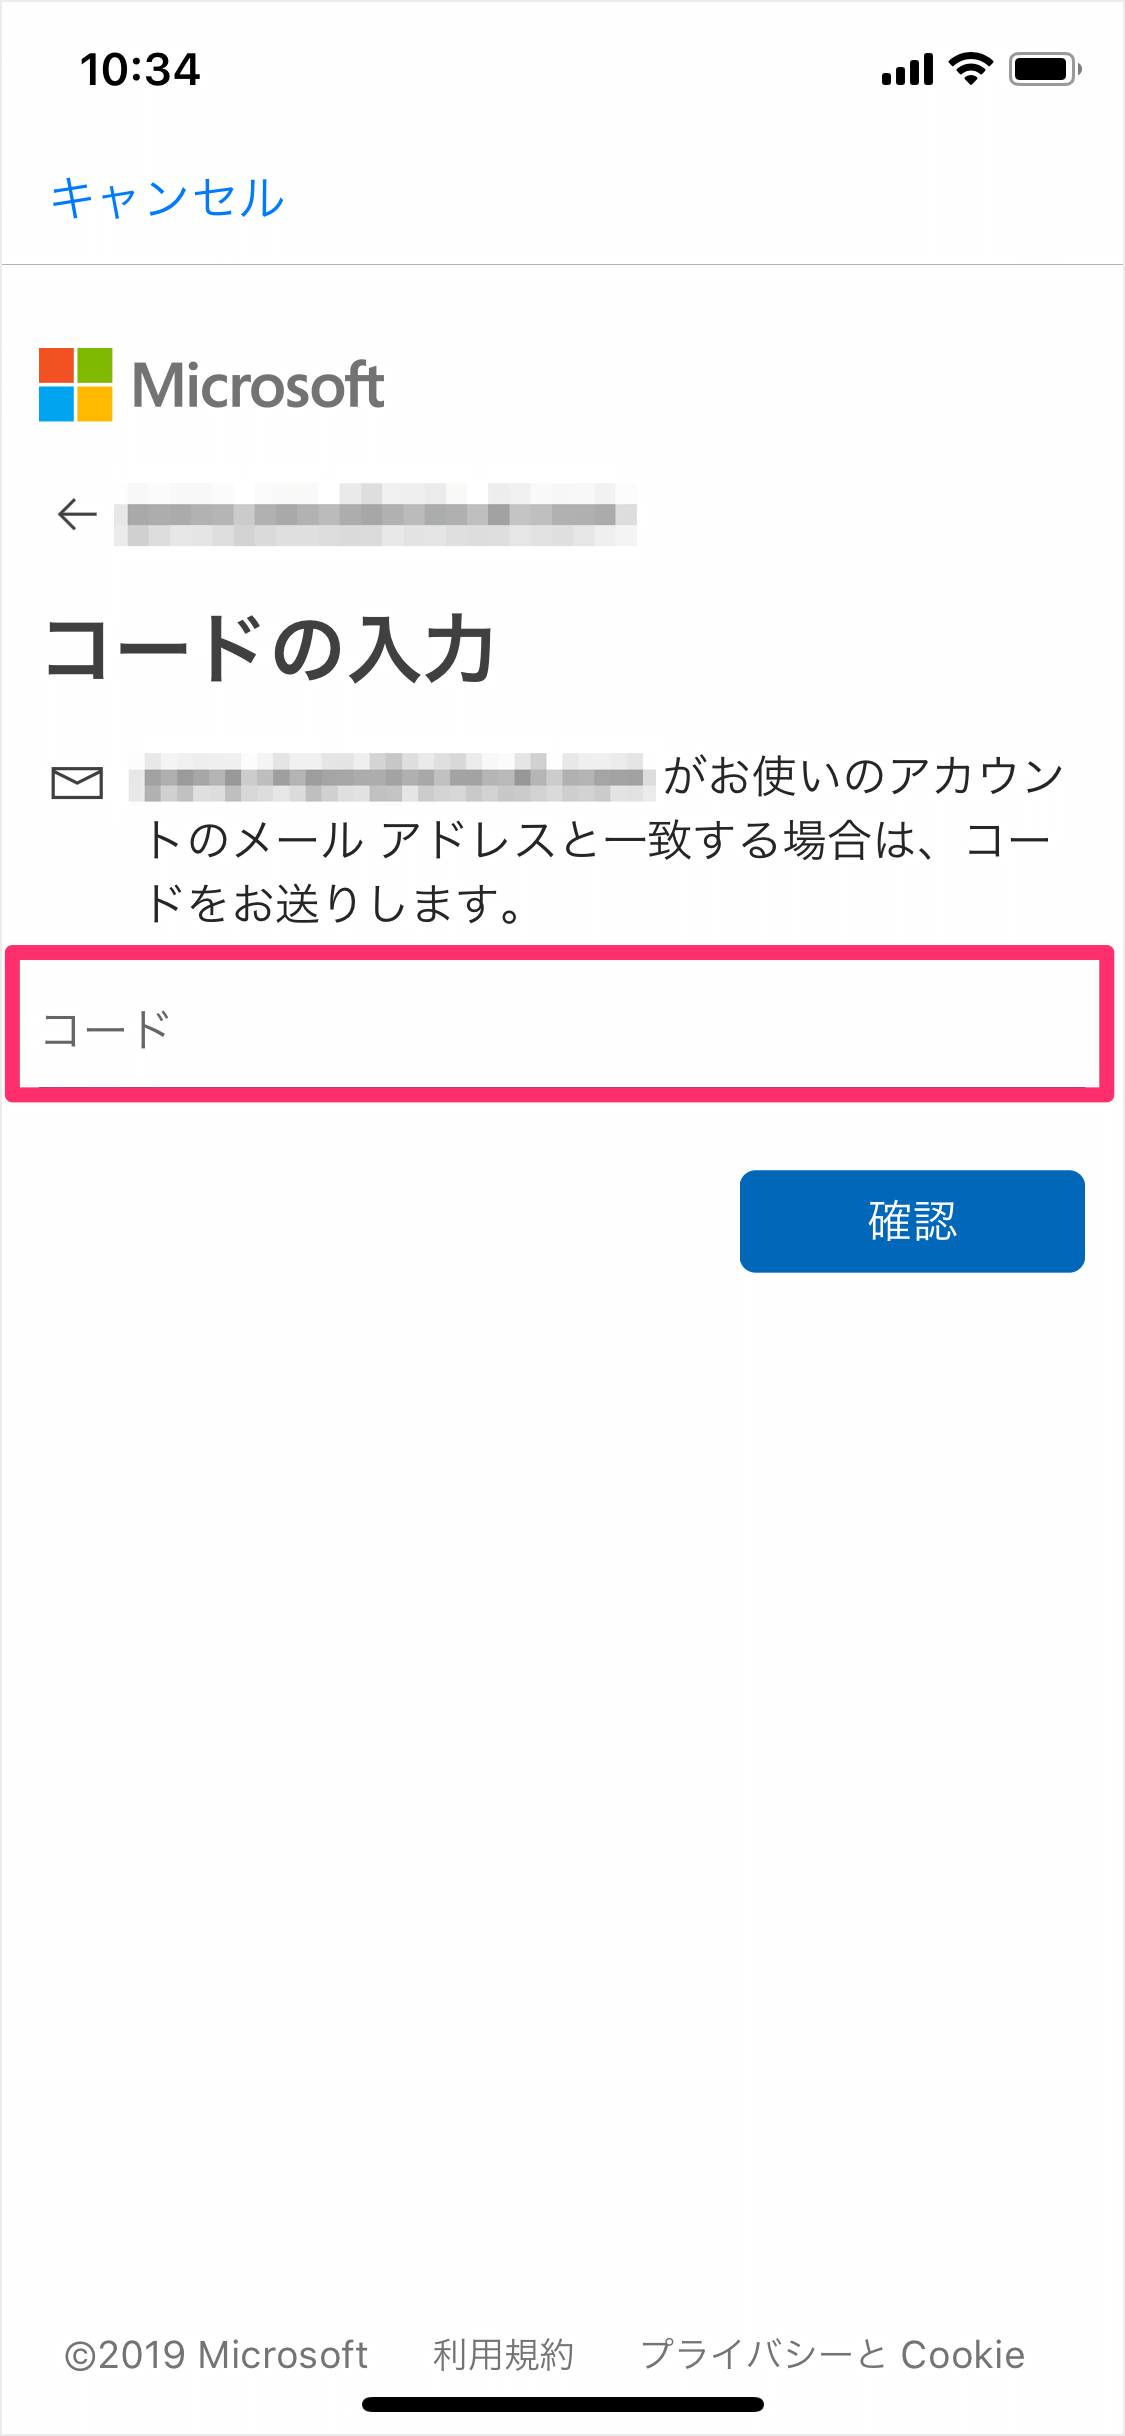
送られてきた「コード」を入力し、「確認」をタップします。
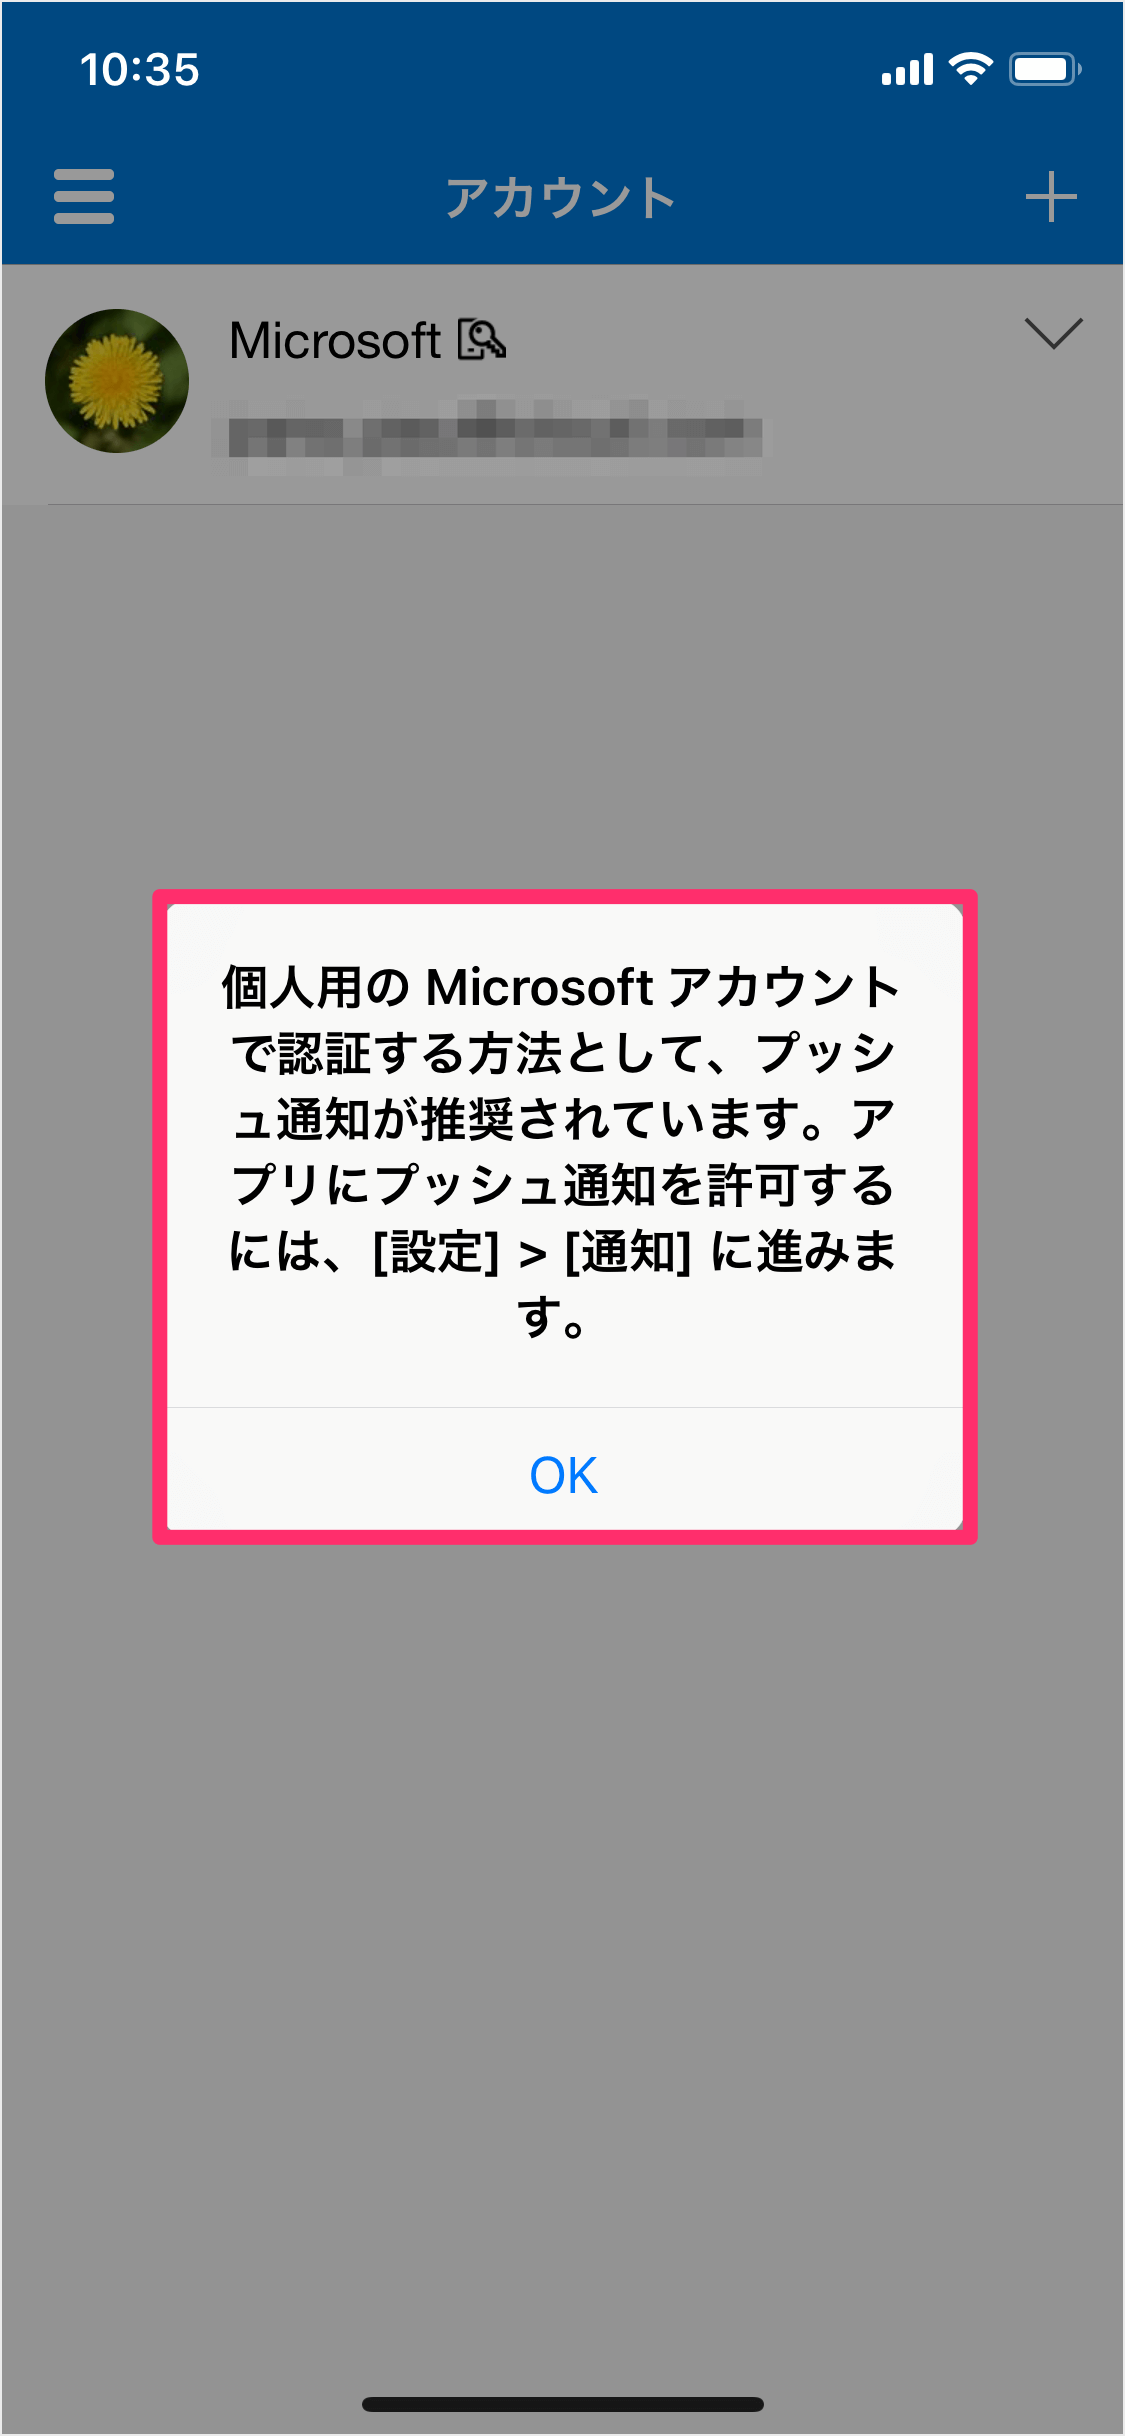
すると、次のようなポップアップが表示されます。
個人用の Microsoftアカウントで認証する方法として、プッシュ通知が推奨されています。アプリにプッシュ通知を許可するには、「設定」→「通知」に進みます。
「OK」をタップします。
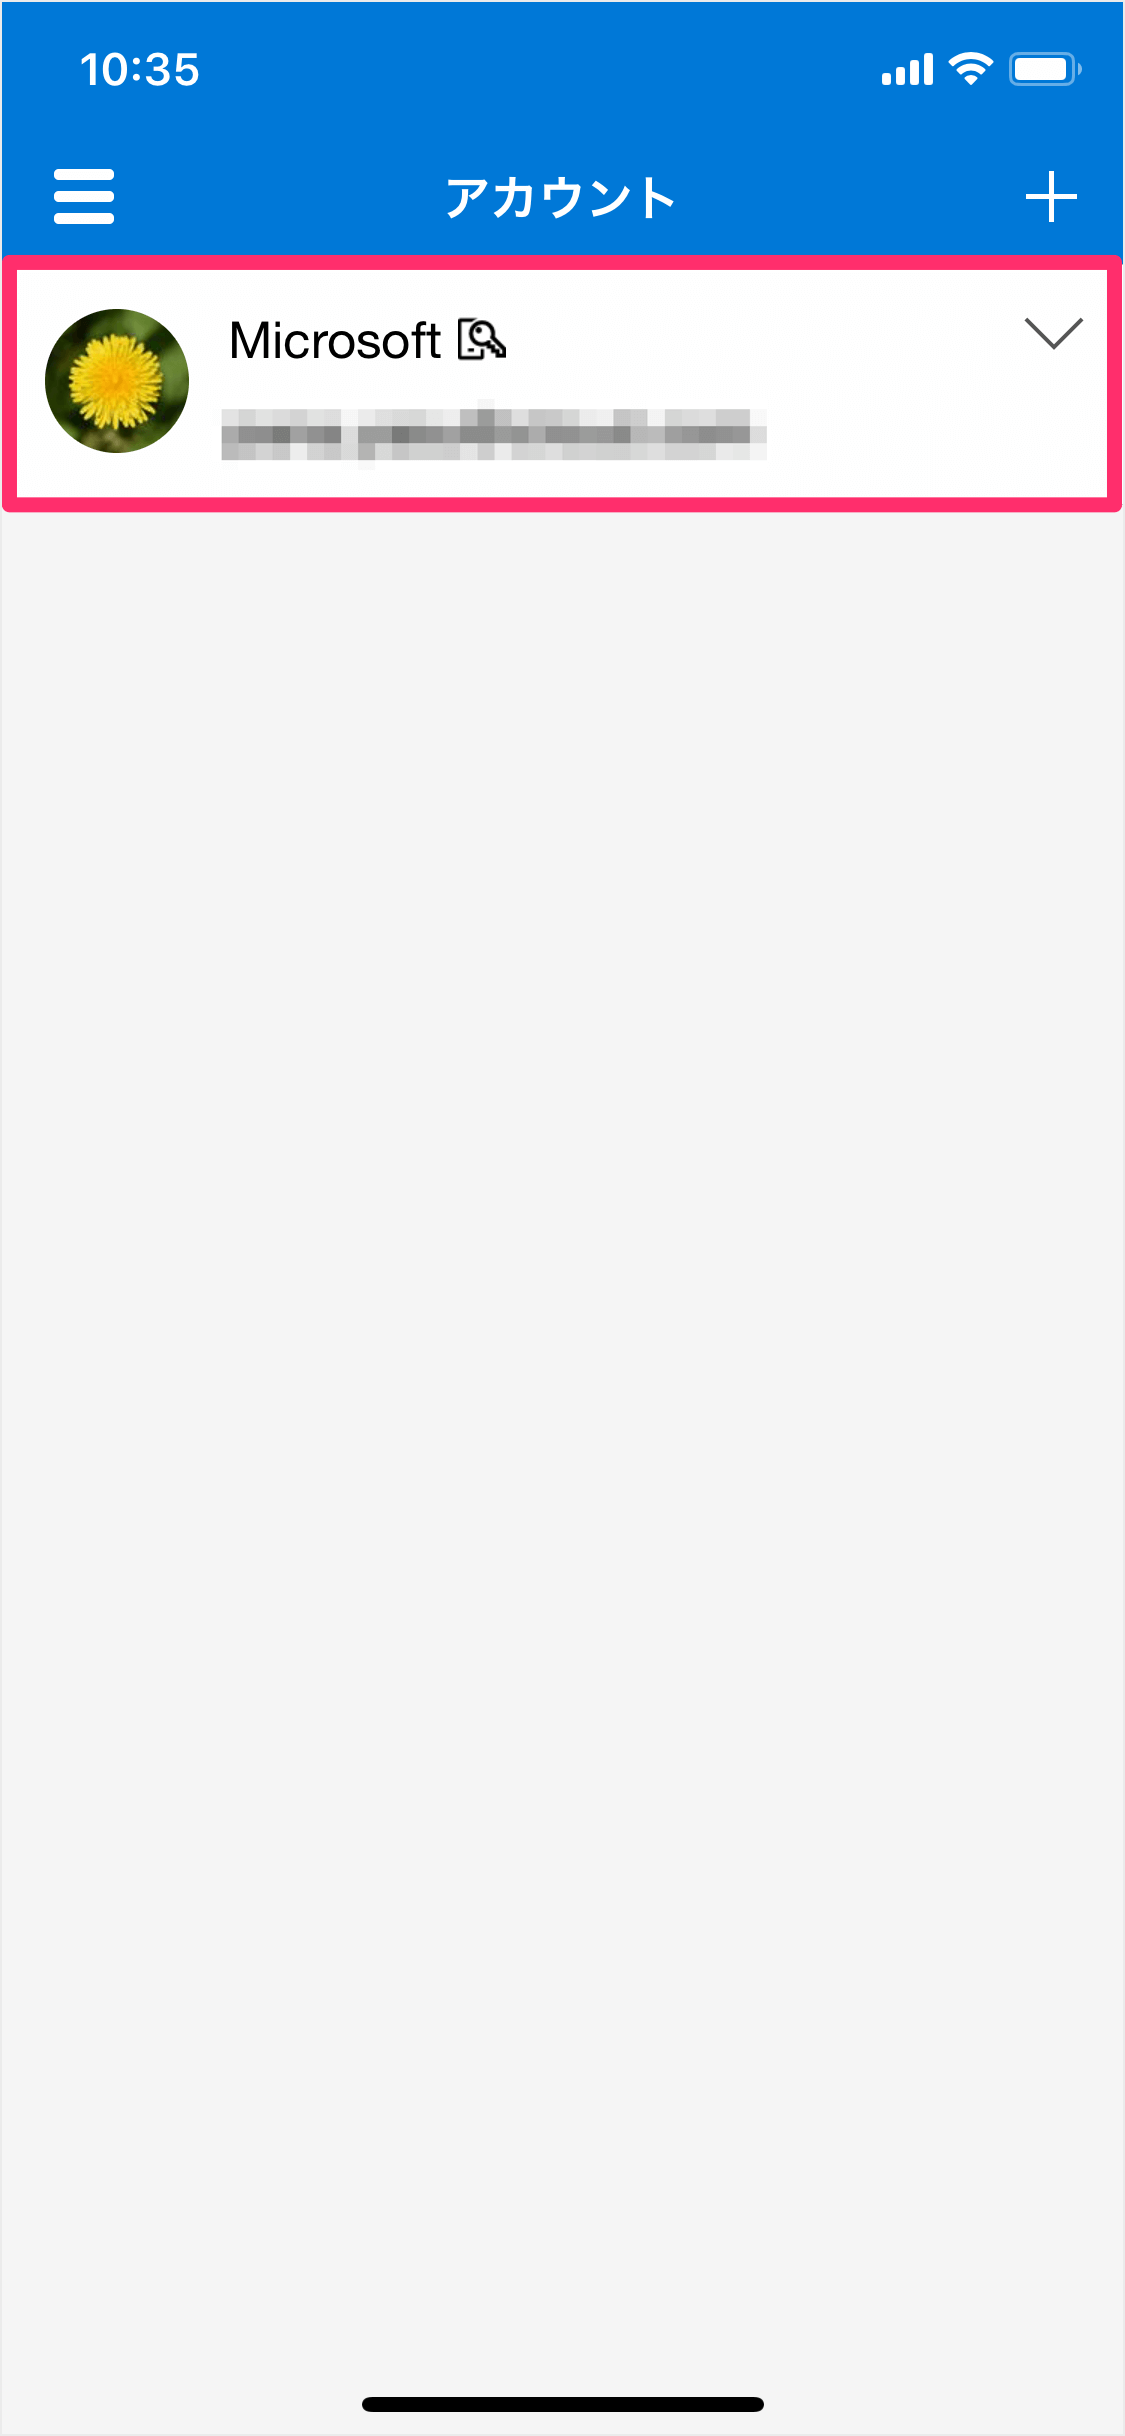
これでMicrosoftアカウントの追加が完了しました。