目次
Windows 11 にニンテンドースイッチのプロコンを接続する方法を紹介します。
任天堂純正のNintendo Switch Proコントローラー(プロコン)は、 Windows 11 にも Bluetooth接続/有線接続できるので、ここではその方法をみていきます。

Windows 11 にプロコンを接続する方法は?
Windows 11 にスイッチのプロコンを接続する方法は次の手順です。
-
[設定] を起動する

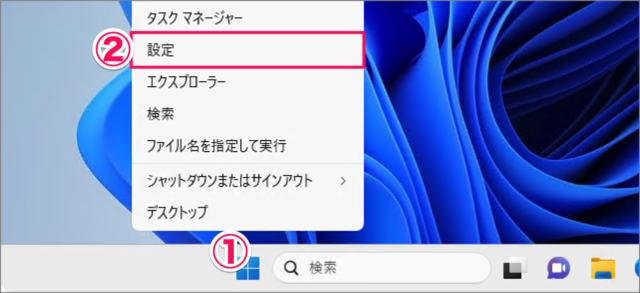
- [スタートボタン] を右クリックし
- [設定] を選択します。
[設定] を起動する方法はいくつかあります。詳しくは、Windows 11 「Windowsの設定」を起動する方法をご覧ください。
-
[Bluetooth とデバイス] を選択する

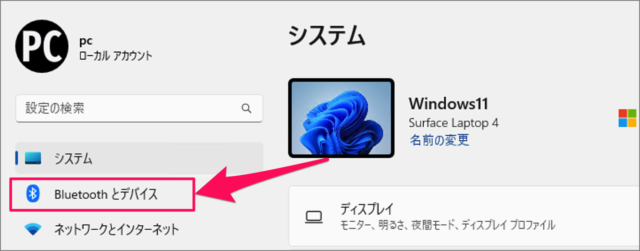
設定の左メニュー [Bluetooth とデバイス] を選択しましょう。 -
[Bluetooth] を [オン] にする

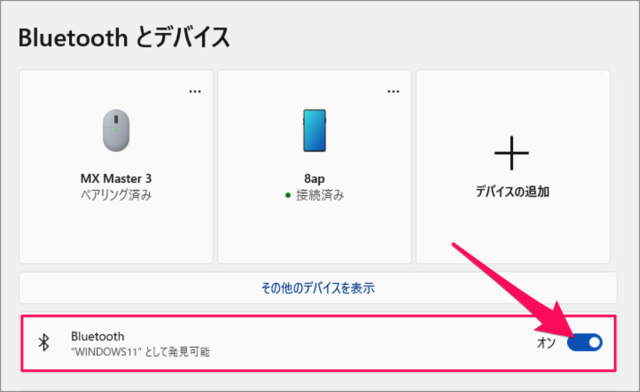
Bluetooth とデバイスの設定です。[Bluetooth] を [オン] にしましょう。 -
[デバイスの追加] をクリックする

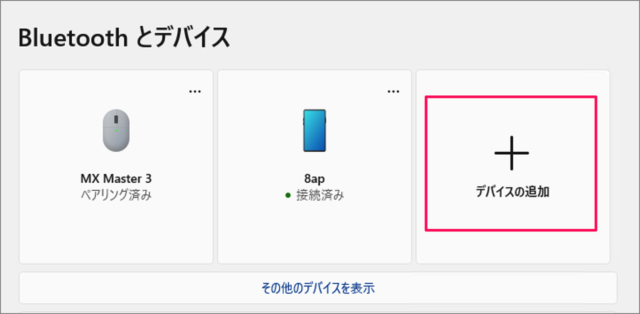
Bluetooth をオンにしたら、[デバイスの追加] をクリックしましょう。 -
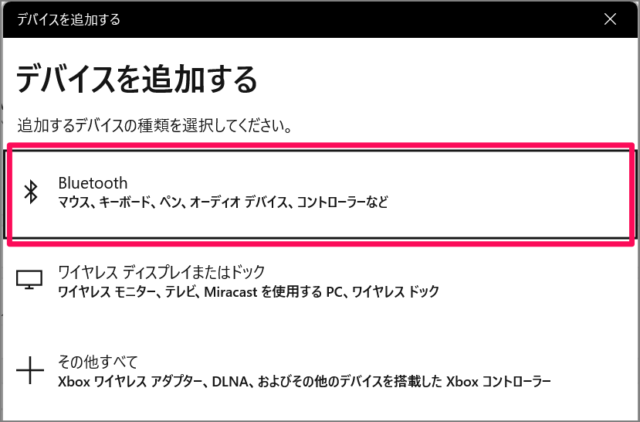
[Bluetooth] を選択する

[デバイスを追加する] ウィンドウが表示されたら、 [Bluetooth] を選択しましょう。 -
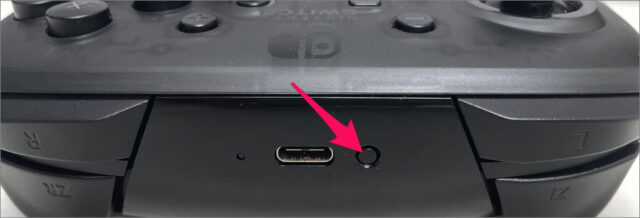
プロコンの [シンクロボタン] を長押しする

-
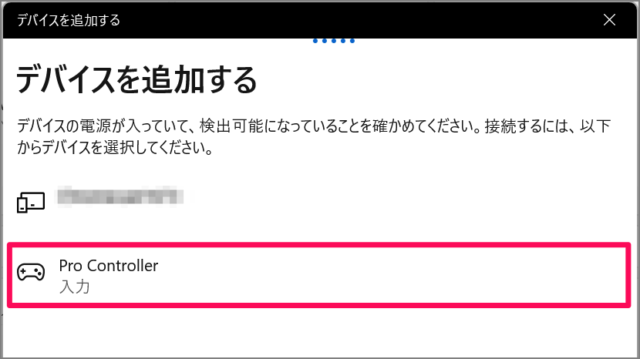
[Pro Controller] を選択する

プロコンがペアリングモードになると、[Pro Controller] が表示されるので、それを選択しましょう。 -
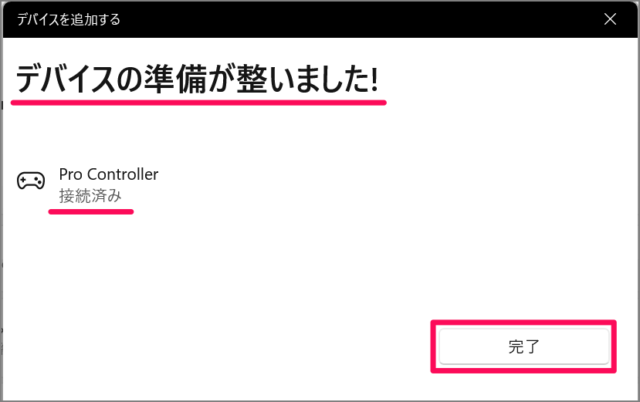
[完了] を選択する

デバイスの準備が整いました。[完了] をクリックしましょう。 -
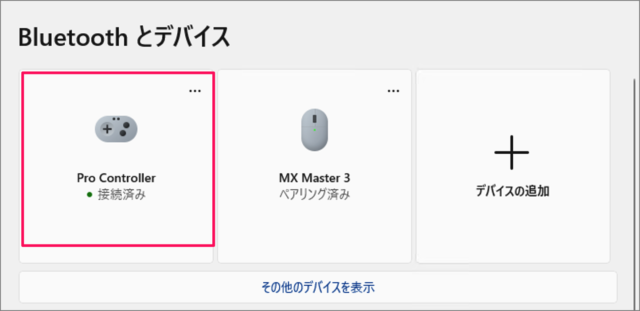
プロコンの接続を確認する

[Pro Controller] が接続されました。