
目次
Windows 11 に AirPods を接続する方法を紹介します。
Apple が開発・販売している [AirPods/AirPods Pro] は、Windows 11 にも接続することができるので、ここではその方法をみていきます。

AirPods を接続する方法は?
Windows 11 に AirPods を接続する方法は次の手順です。
-
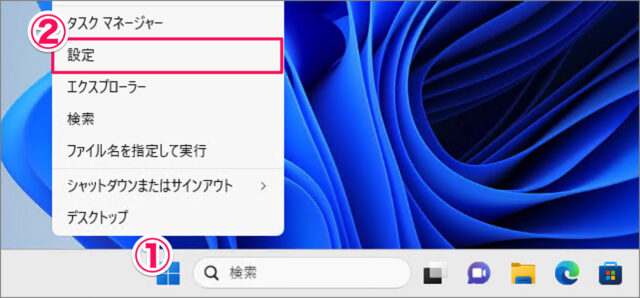
[設定] を起動する

- [スタートボタン] を右クリックし
- [設定] を選択します。
[設定] を起動する方法はいくつかあります。詳しくは、Windows 11 「Windowsの設定」を起動する方法をご覧ください。
-
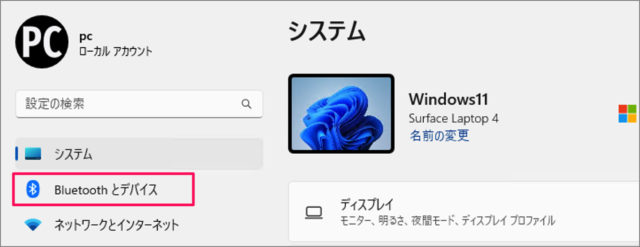
[Bluetooth とデバイス] を選択する

設定の左メニュー [Bluetooth とデバイス] を選択しましょう。 -
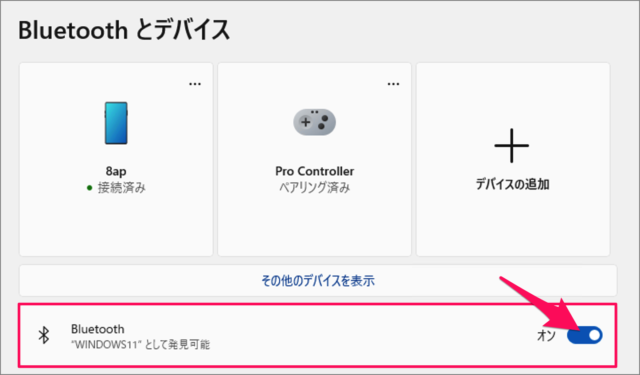
[Bluetooth] を [オン] にする

[Bluetooth] を [オン] にしましょう。[Bluetooth] を [オン] にする方法はいくつかあります。詳しくは、Windows 11 Bluetooth をオン/オフにする方法をご覧ください。
-
[デバイスの追加] をクリックする

Bluetoothをオンにしたら、 [デバイスの追加] をクリックしましょう。 -
[Bluetooth] を選択する

デバイスの追加です。 [Bluetooth] を選択しましょう。 -
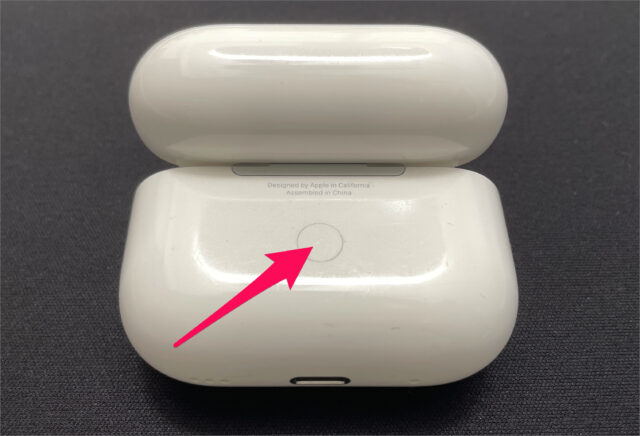
ケースの蓋を開ける

AirPods をケースに入れ、蓋を開けましょう。 -
ケースの背面ボタンを長押しする

ケースの背面ボタン(ペアリングボタン)を長押ししましょう。 -
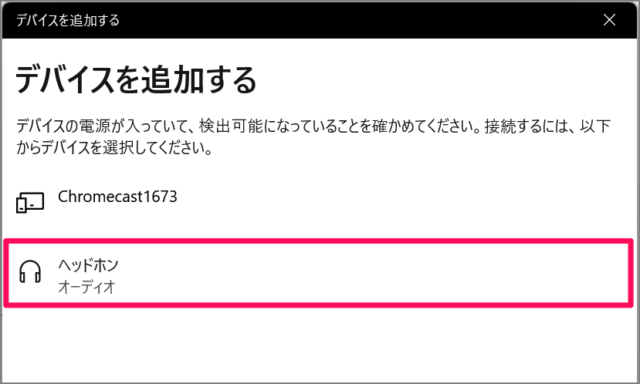
[ヘッドホン] を選択する

表示された [ヘッドホン] を選択しましょう。[ヘッドホン] が表示されたら、ボタンの長押しを離してOKです。
-
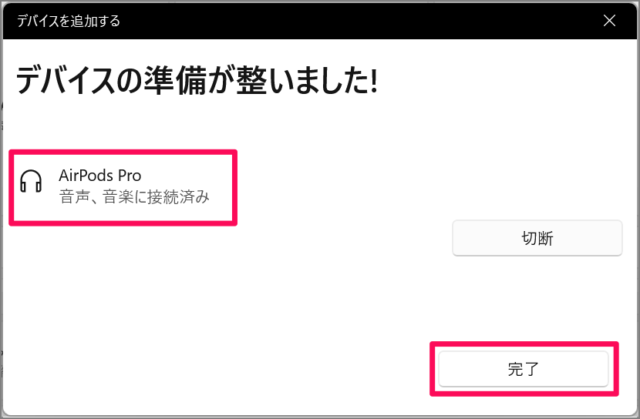
AirPods の接続完了!

これで AirPods を接続できました。 [完了] をクリックしましょう。


これで Windows 11 に AirPods を接続する方法の解説は終了です。