
目次
iPhone/iPad 「Twitter」公式アプリで、ログイン認証(2段階認証)を有効にする方法を紹介します。
iOSアプリ「Twitter」 - ログイン認証(2段階認証)を有効に
それでは実際にログイン認証を有効にしてみましょう。

アプリ「Twitter」を起動します。

画面左上の「プロフィール」アイコンをタップします。
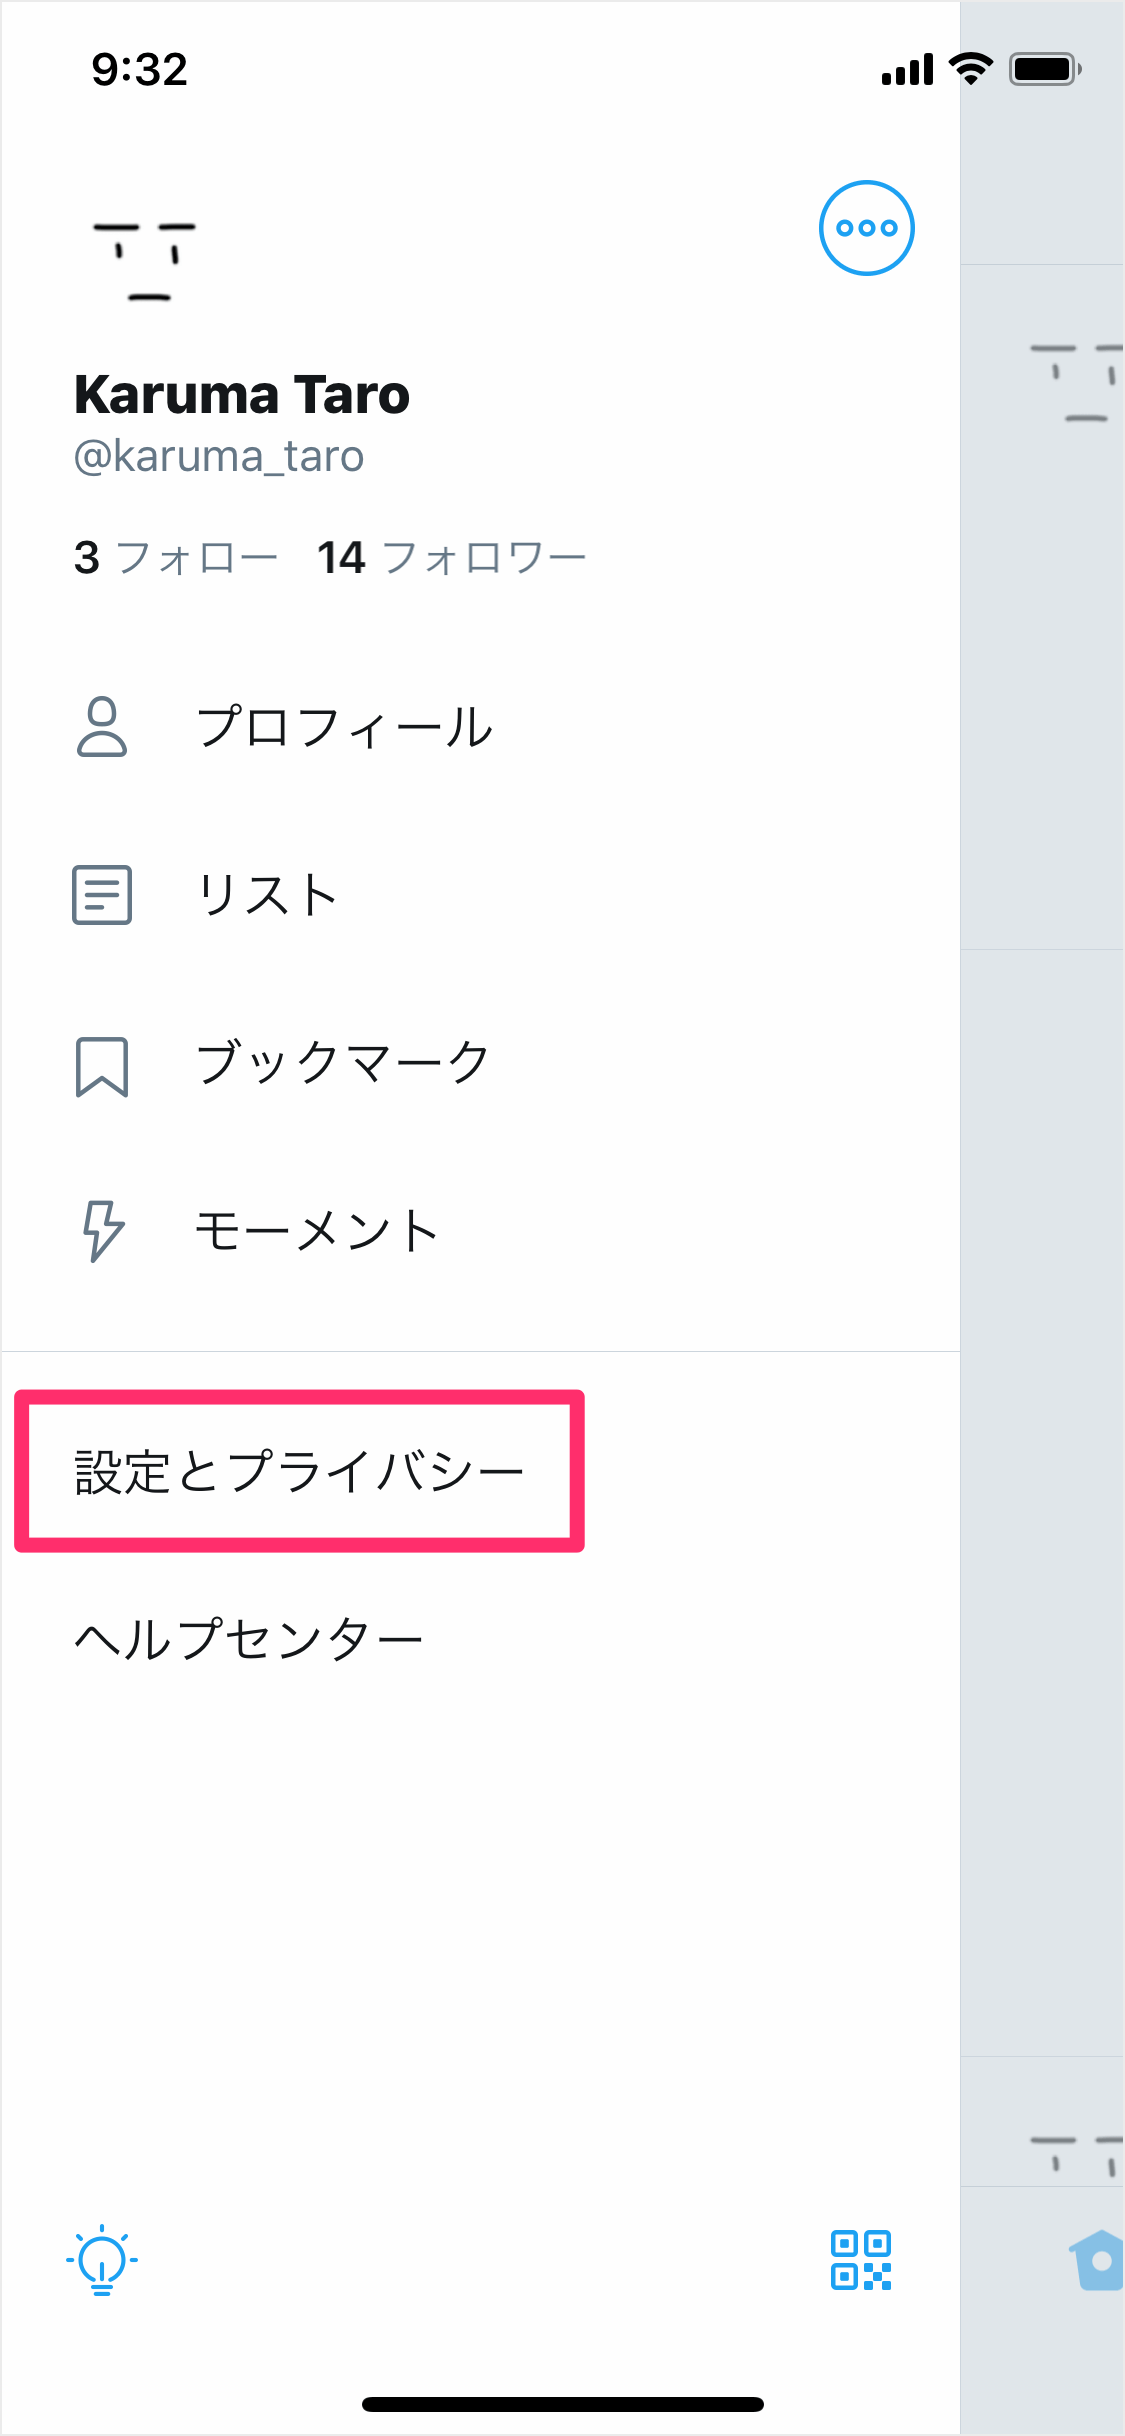
すると、メニューが表示されるので
「設定とプライバシー」をタップしましょう。
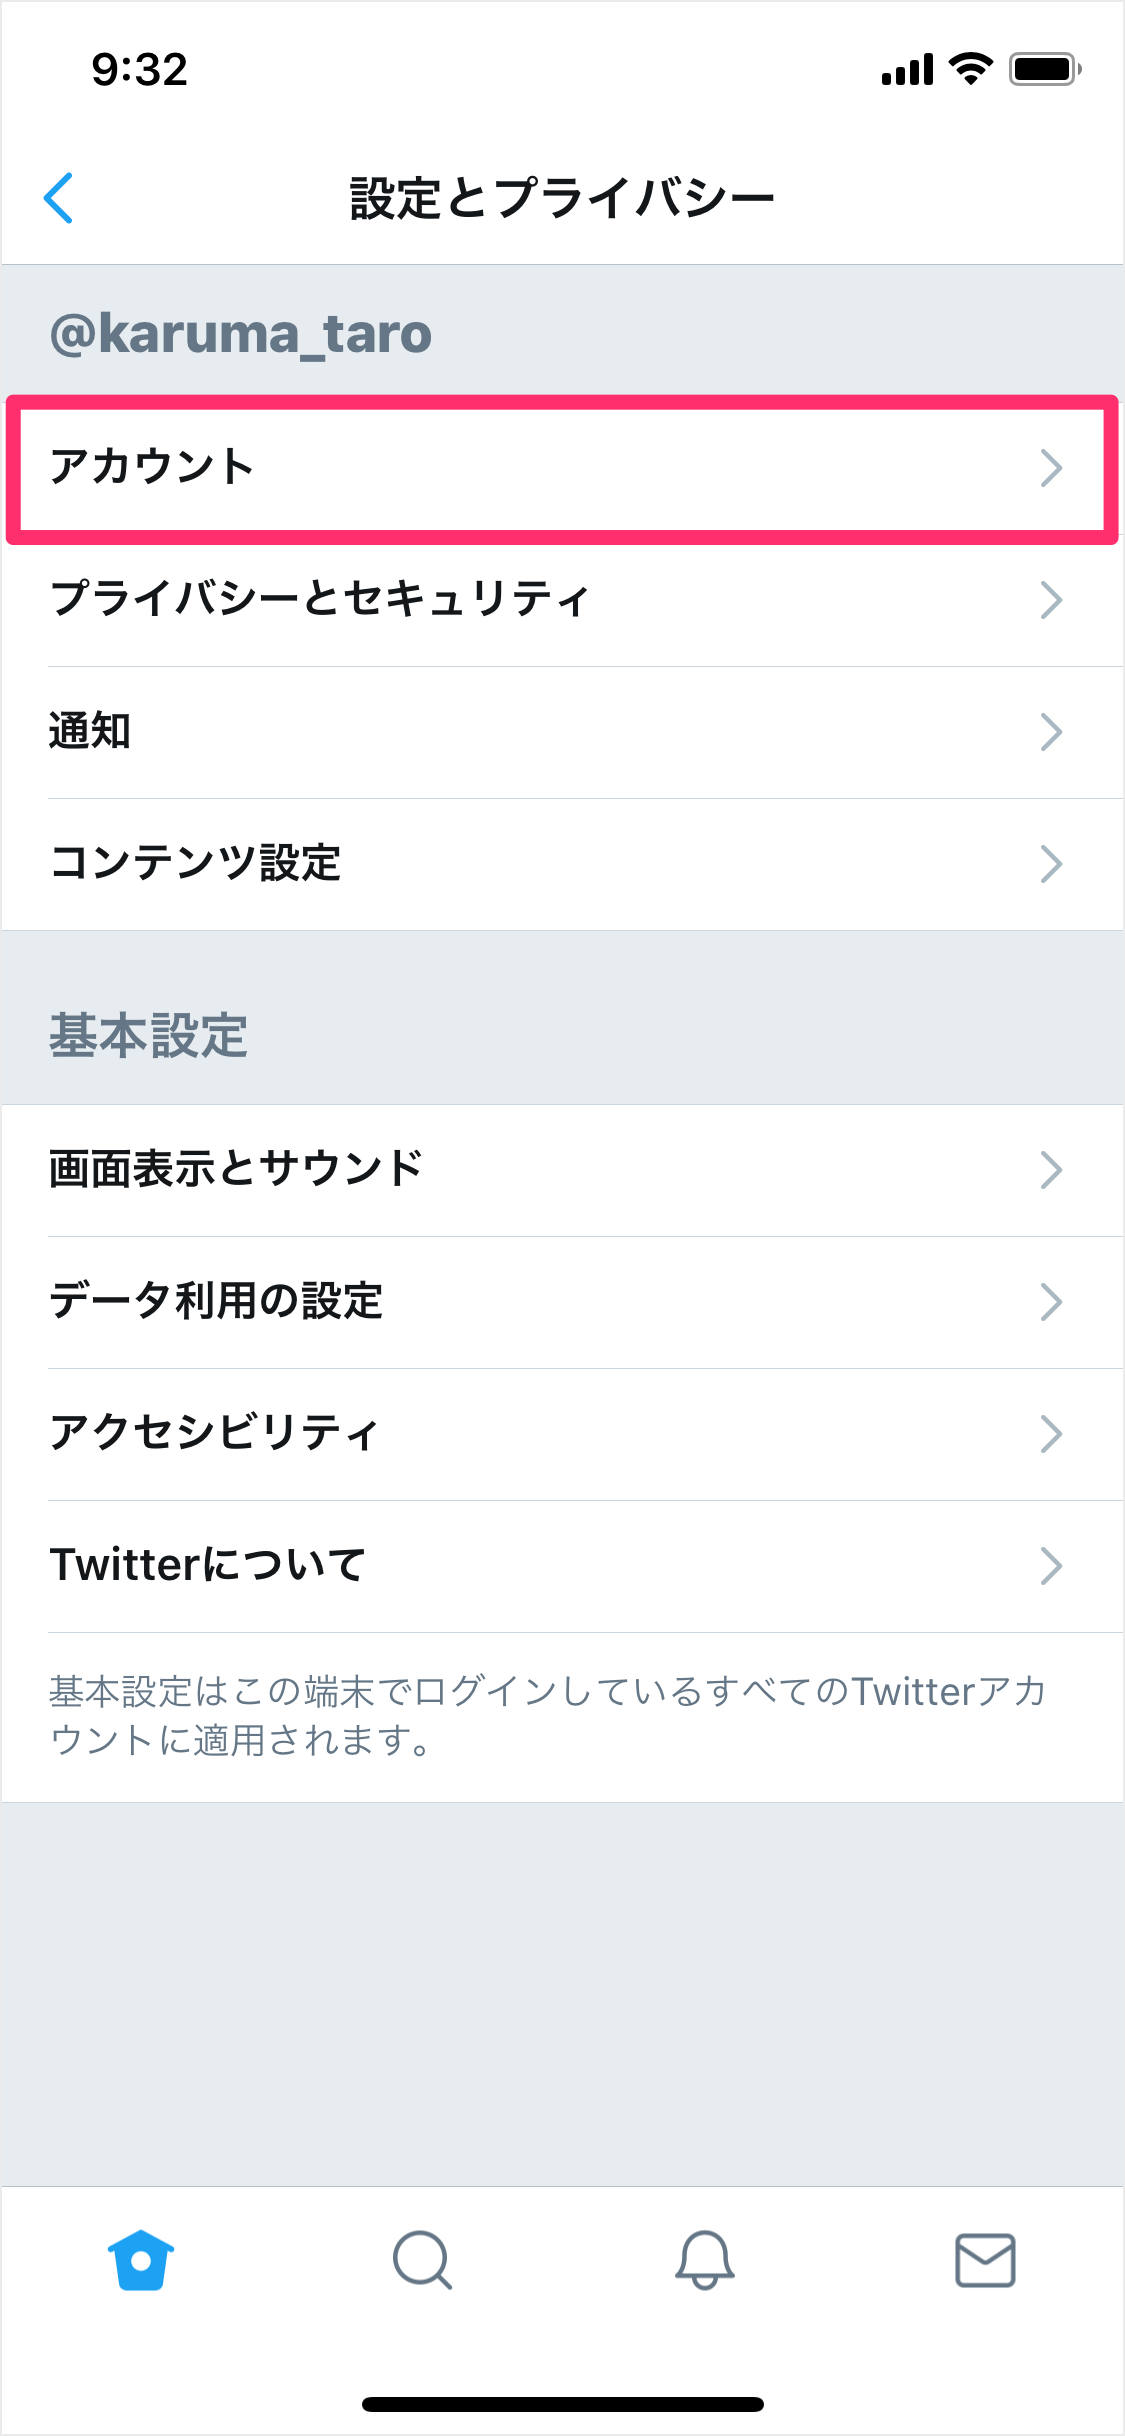
設定です。
「アカウント」をタップしましょう。
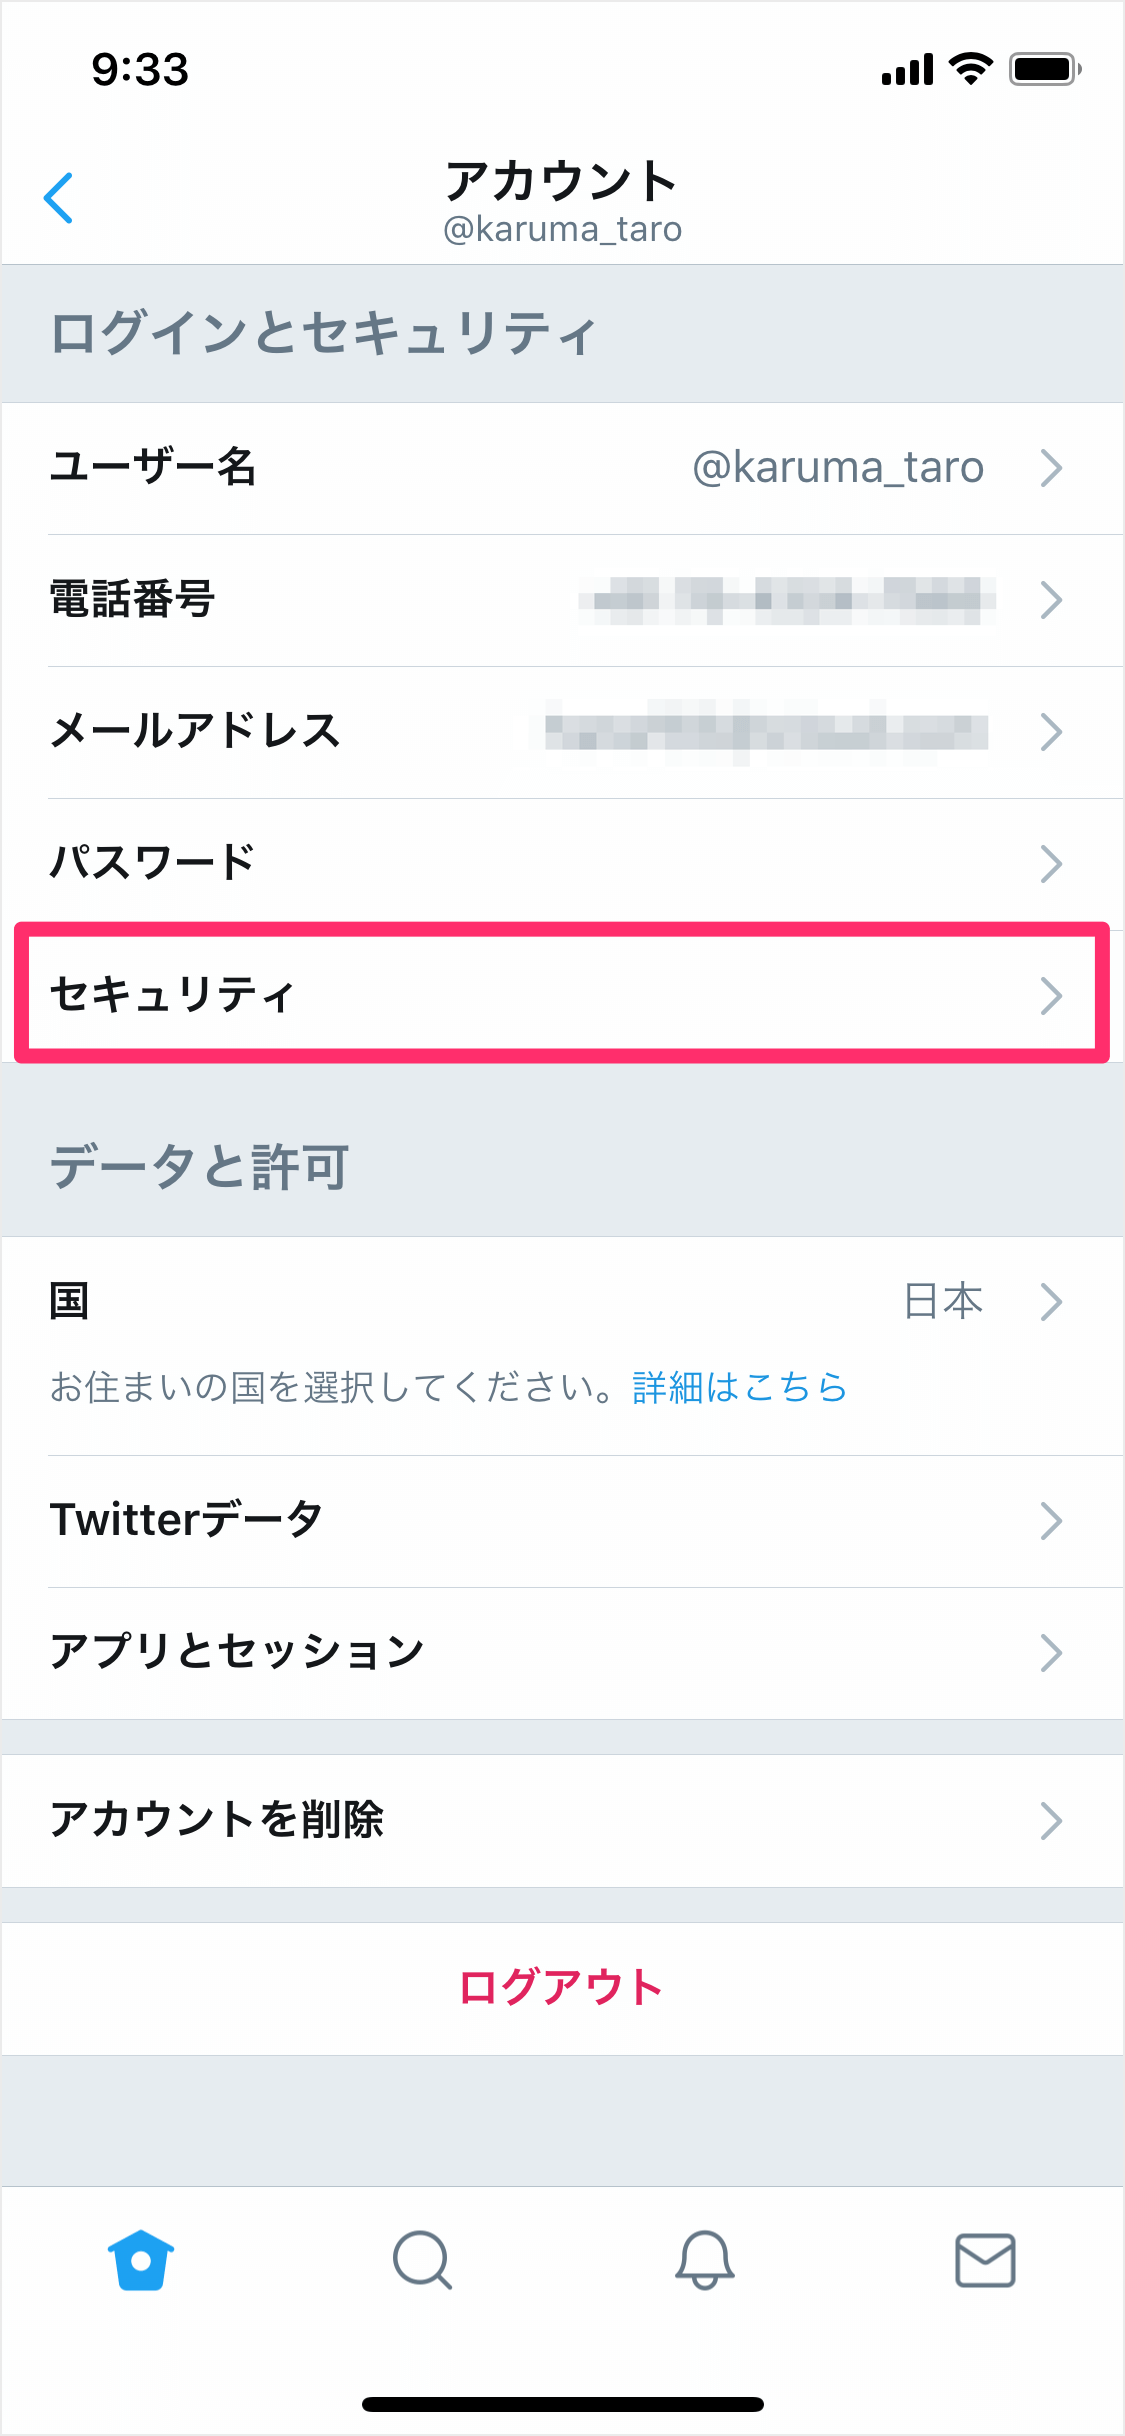
「セキュリティ」をタップします。

セキュリティの設定です。
ログイン認証をタップしましょう。
ログイン認証
ログインする際にこの携帯電話を使って2段階認証を行います。
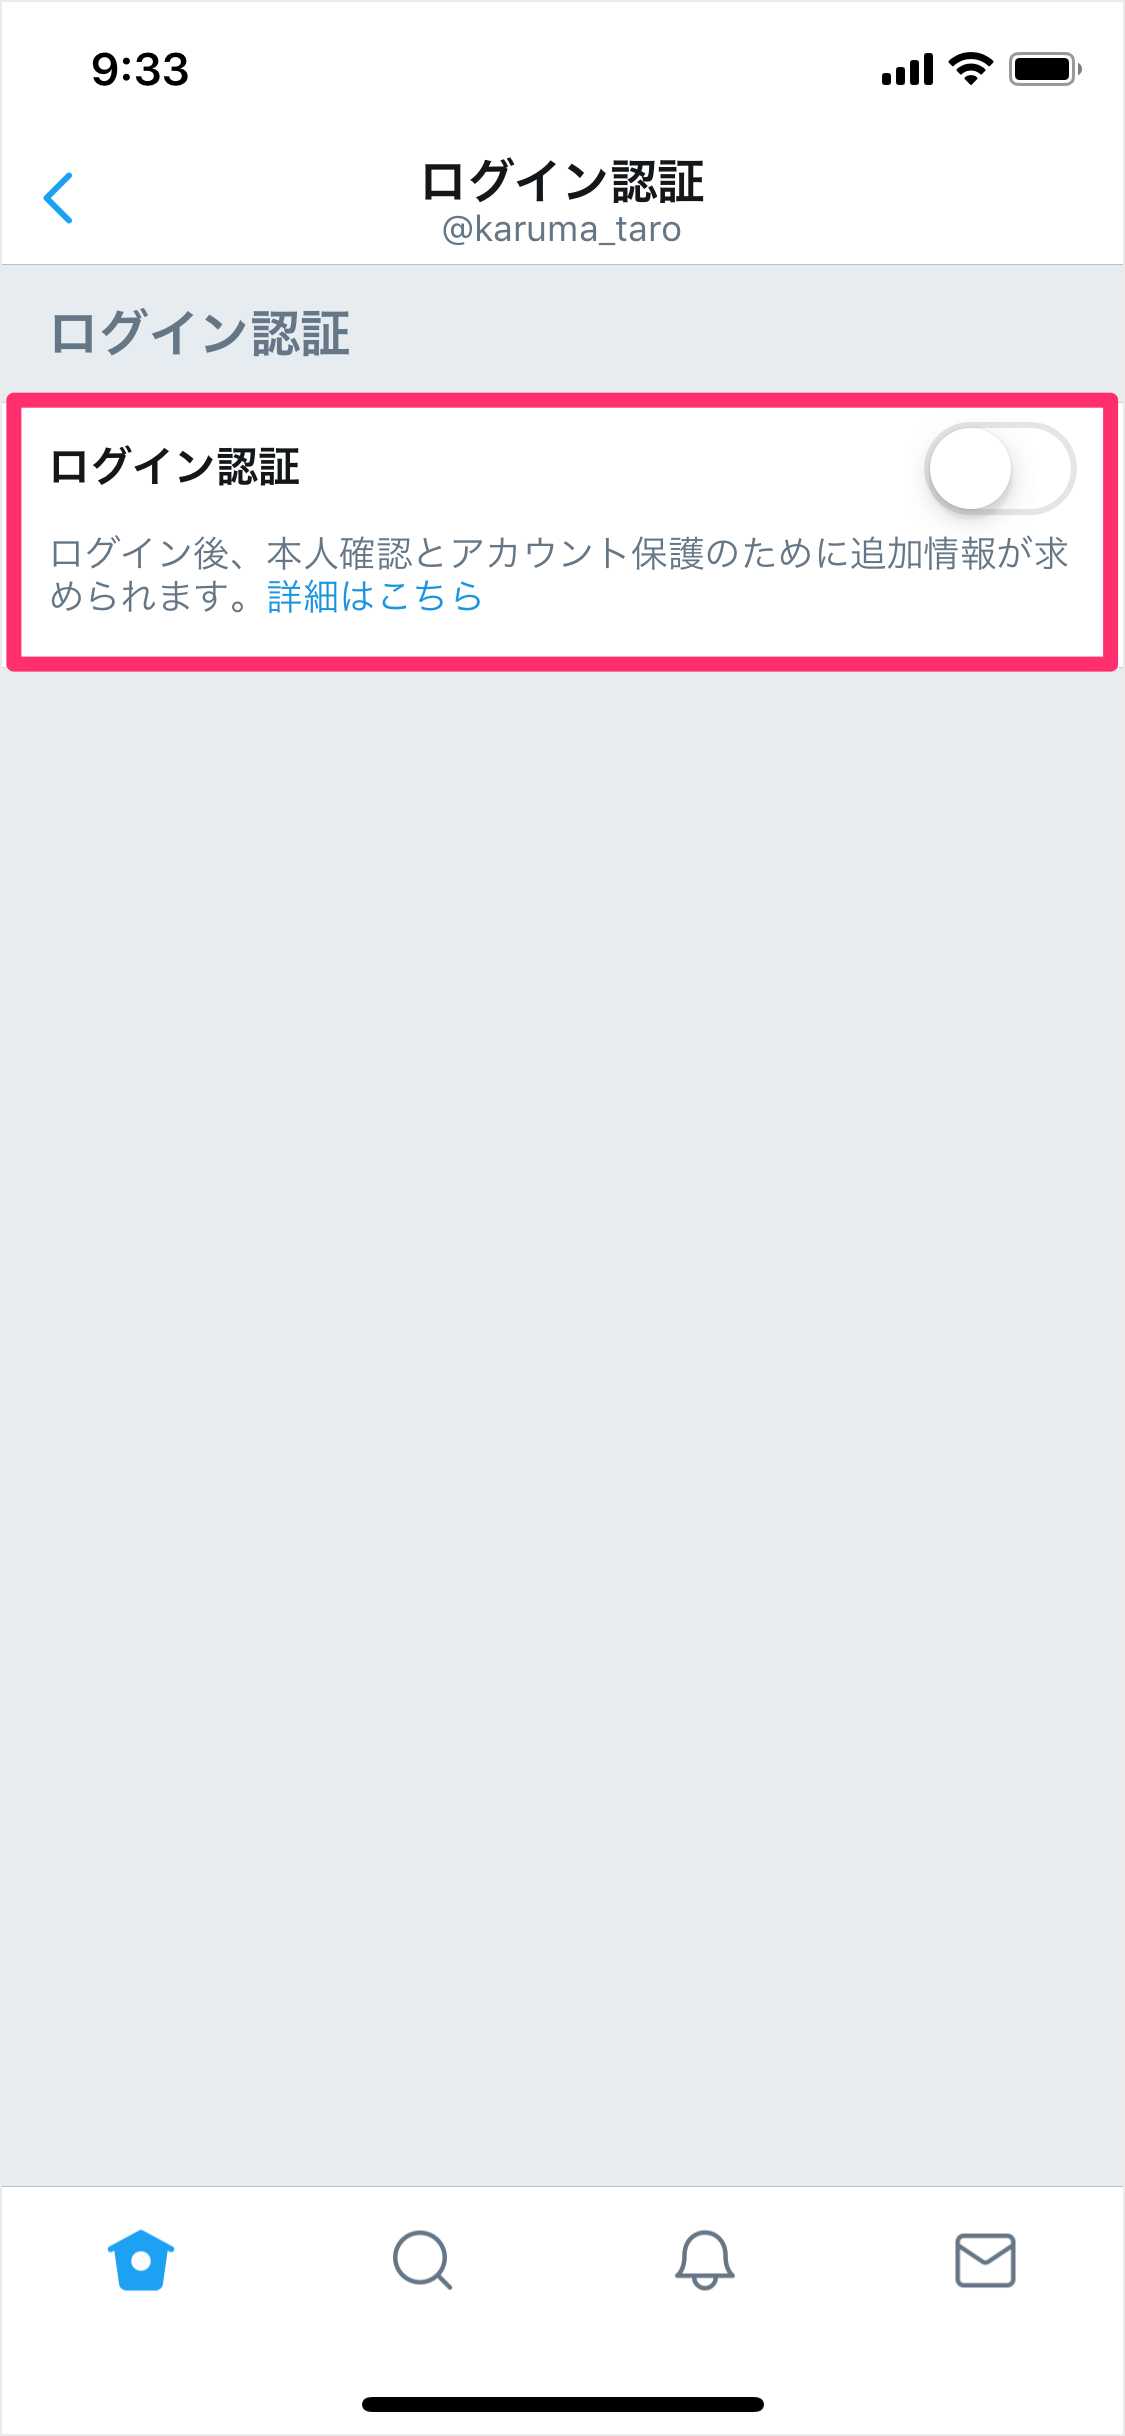
ログイン認証を有効(オン)にしましょう。
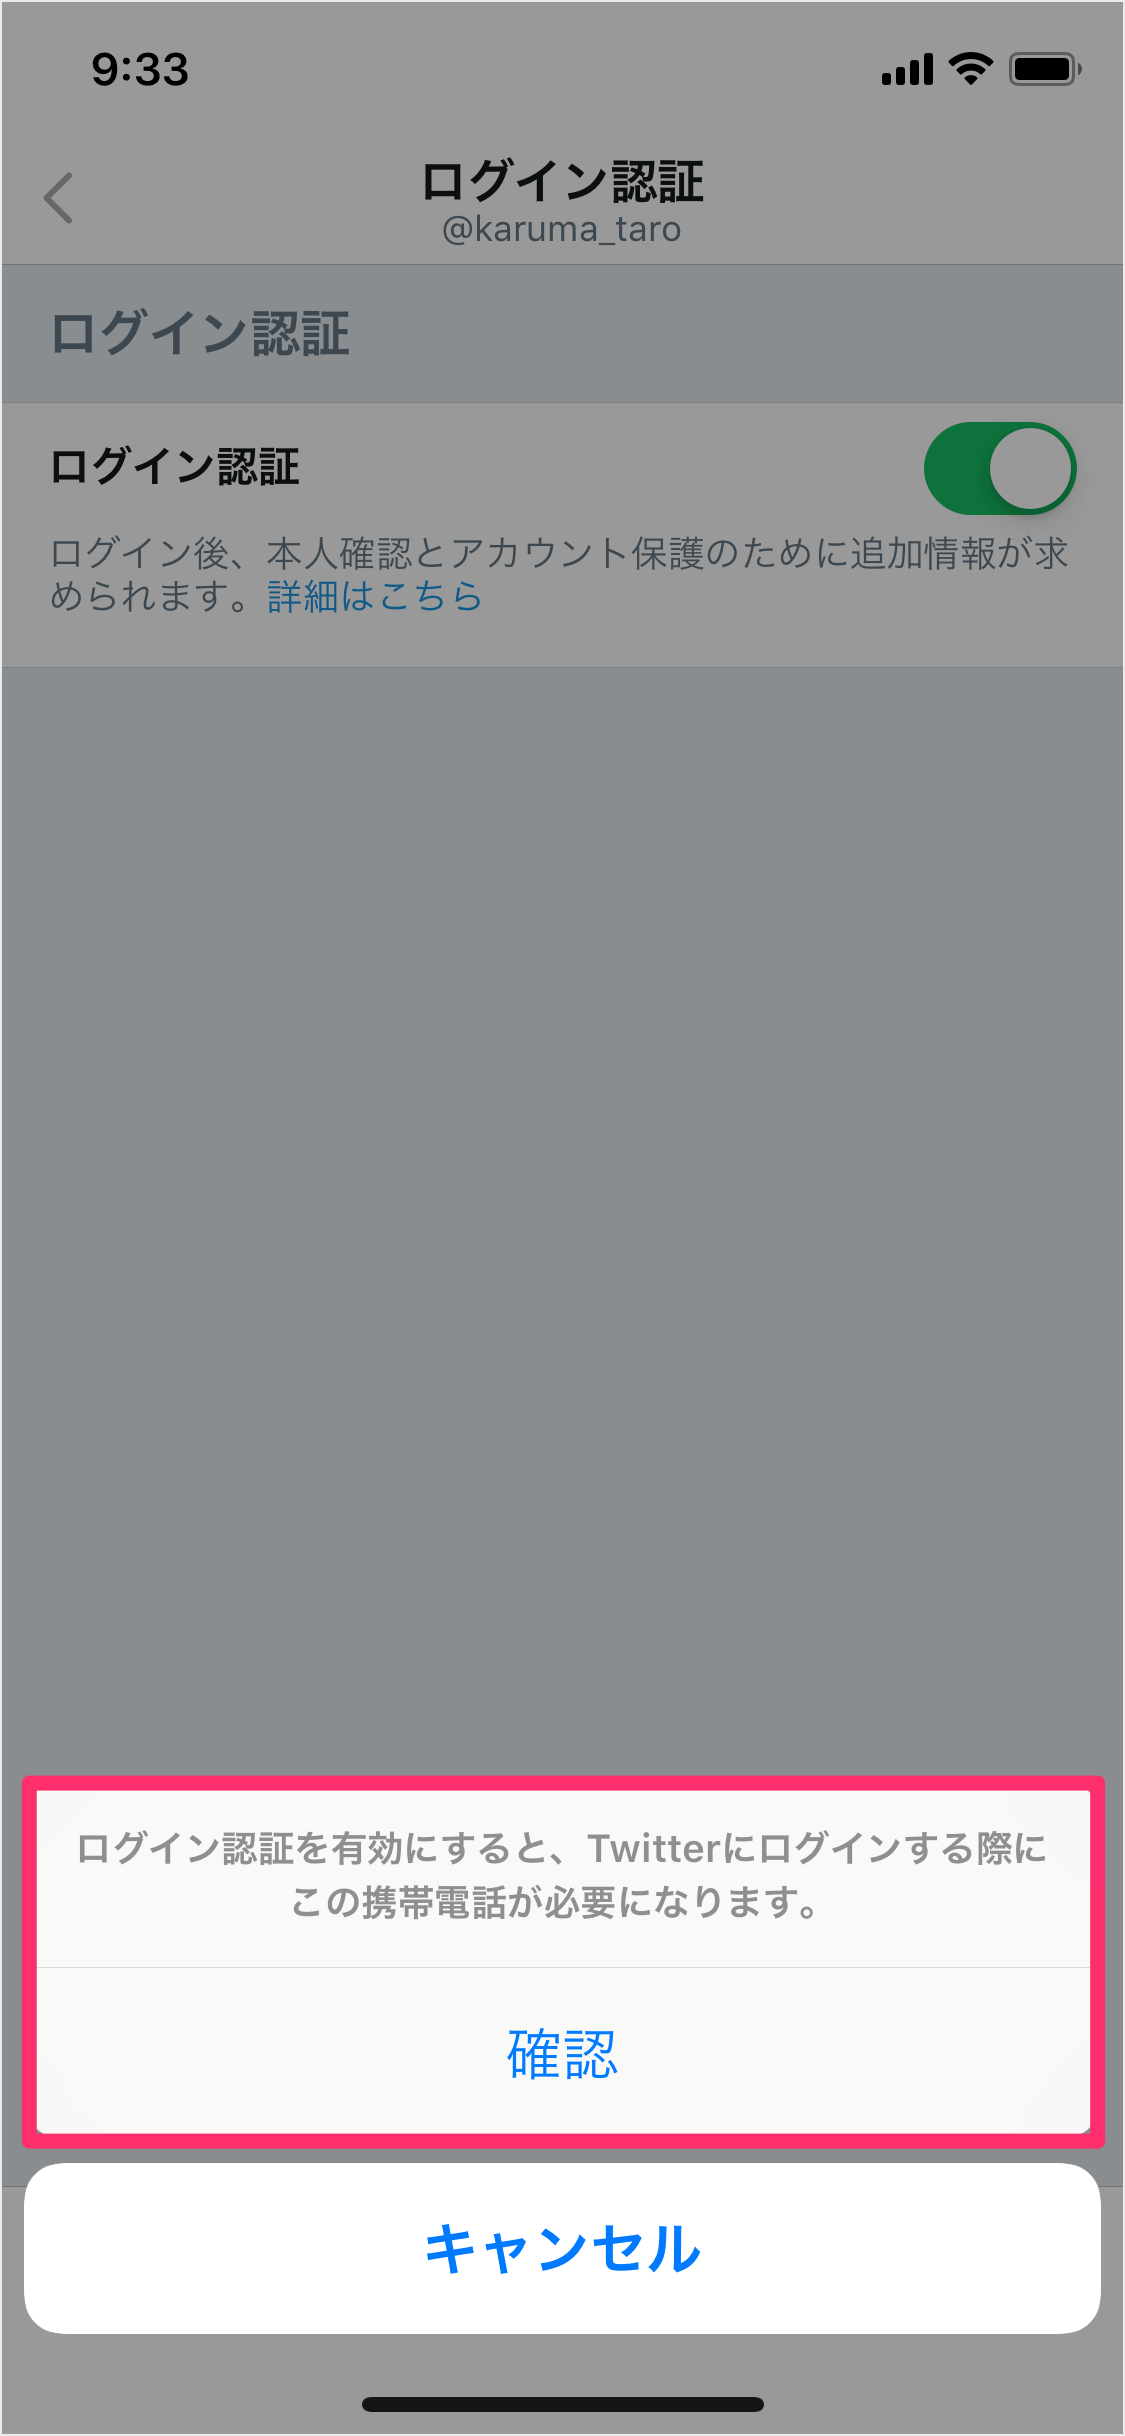
すると、次のようなポップアップが表示されるので
ログイン認証を有効にすると、Twitterにログインする際にこの携帯電話が必要になります。
「確認」をタップします。
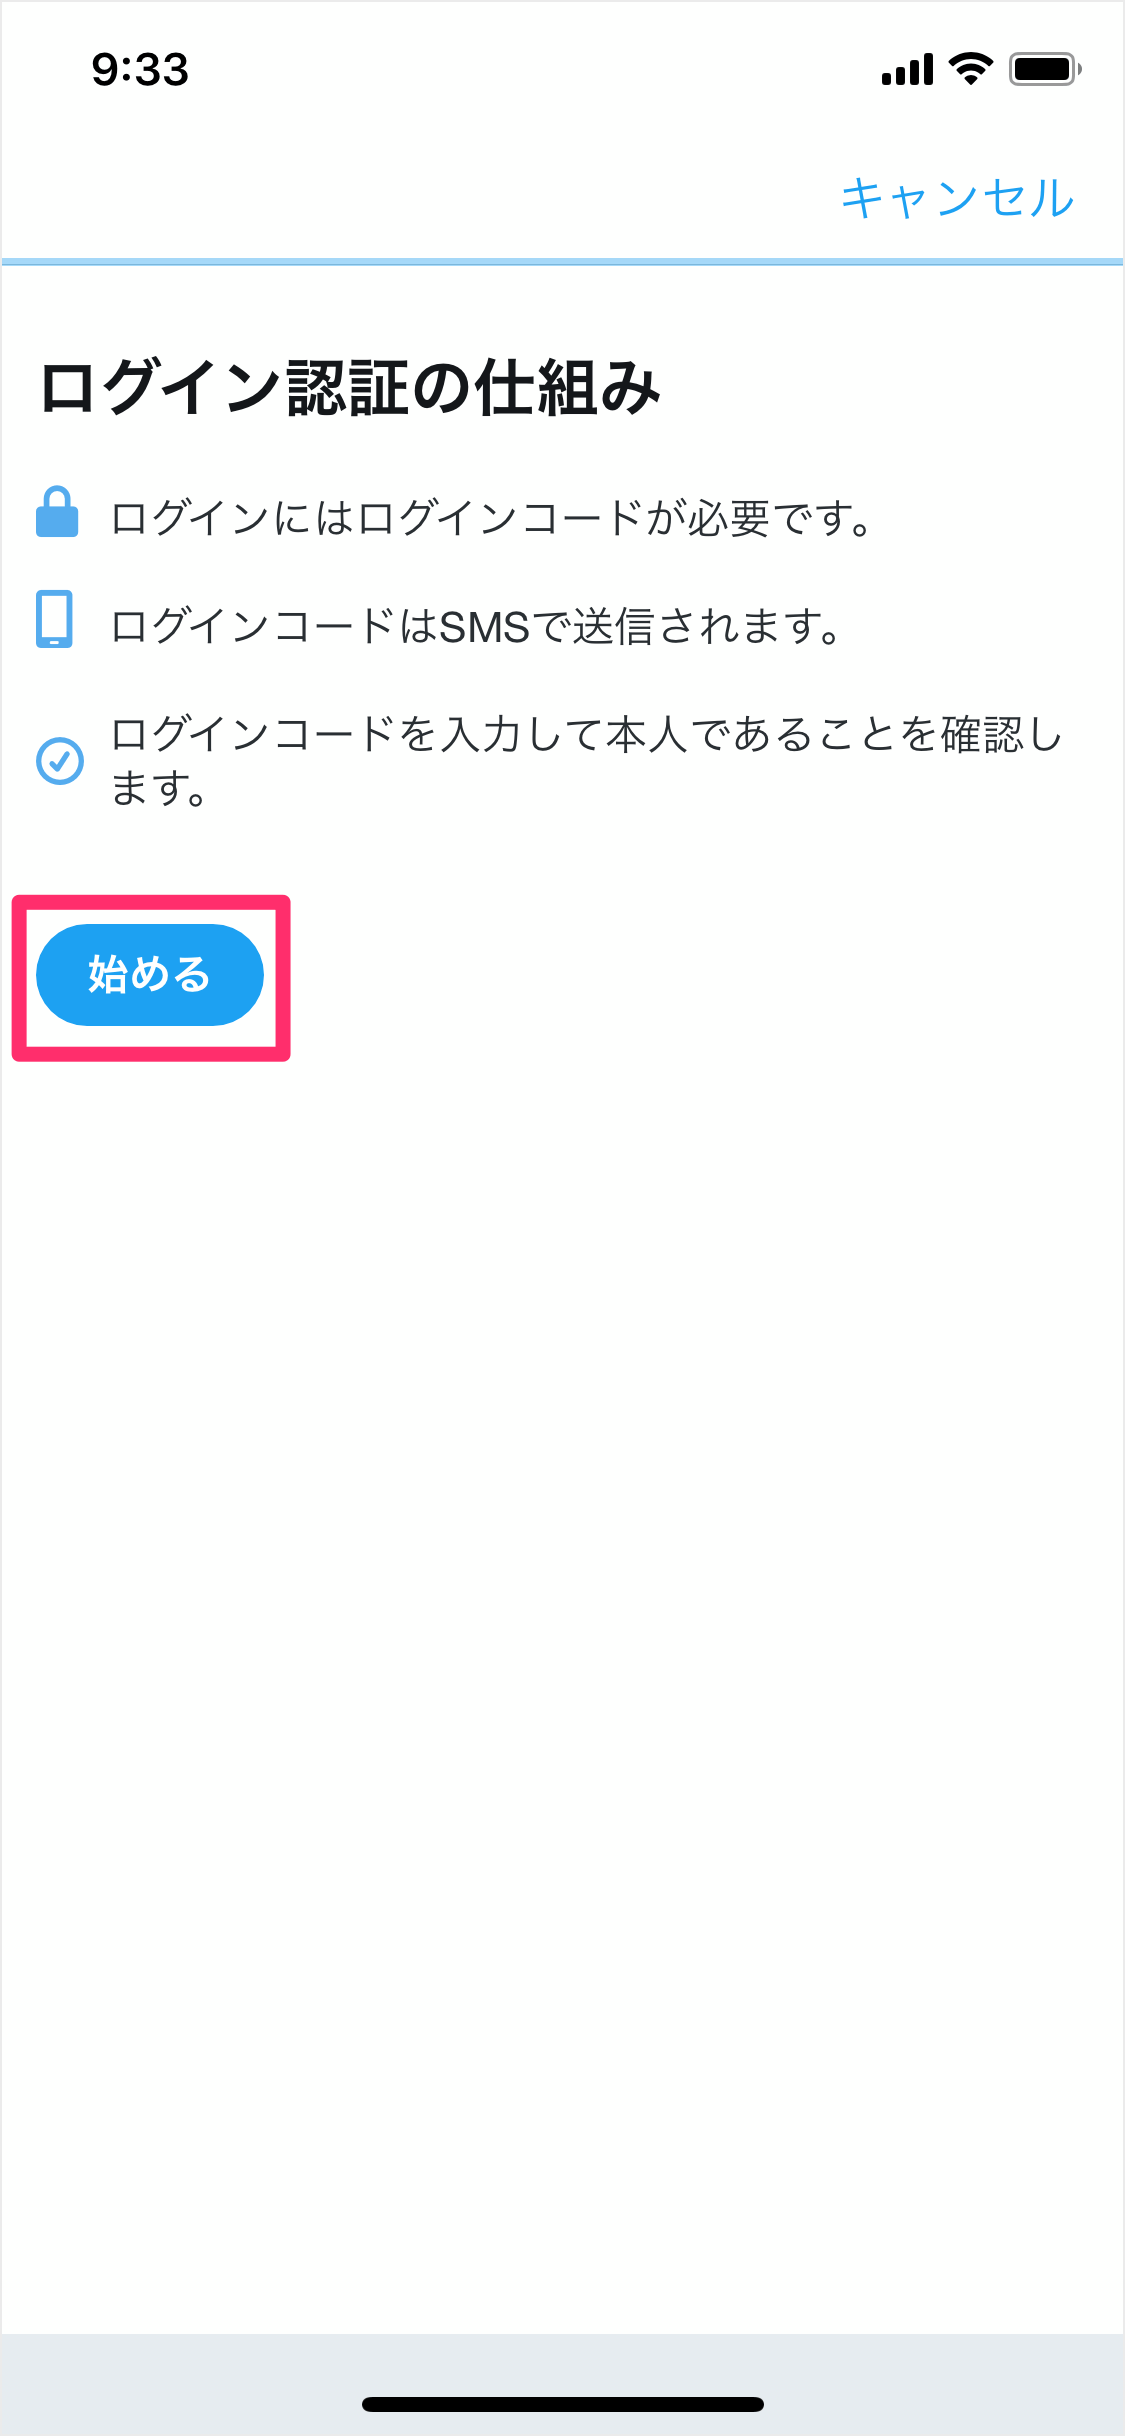
ログイン認証の仕組みを確認しておきましょう。
「始める」をタップします。

「パスワード」を入力し、「認証する」をタップします。
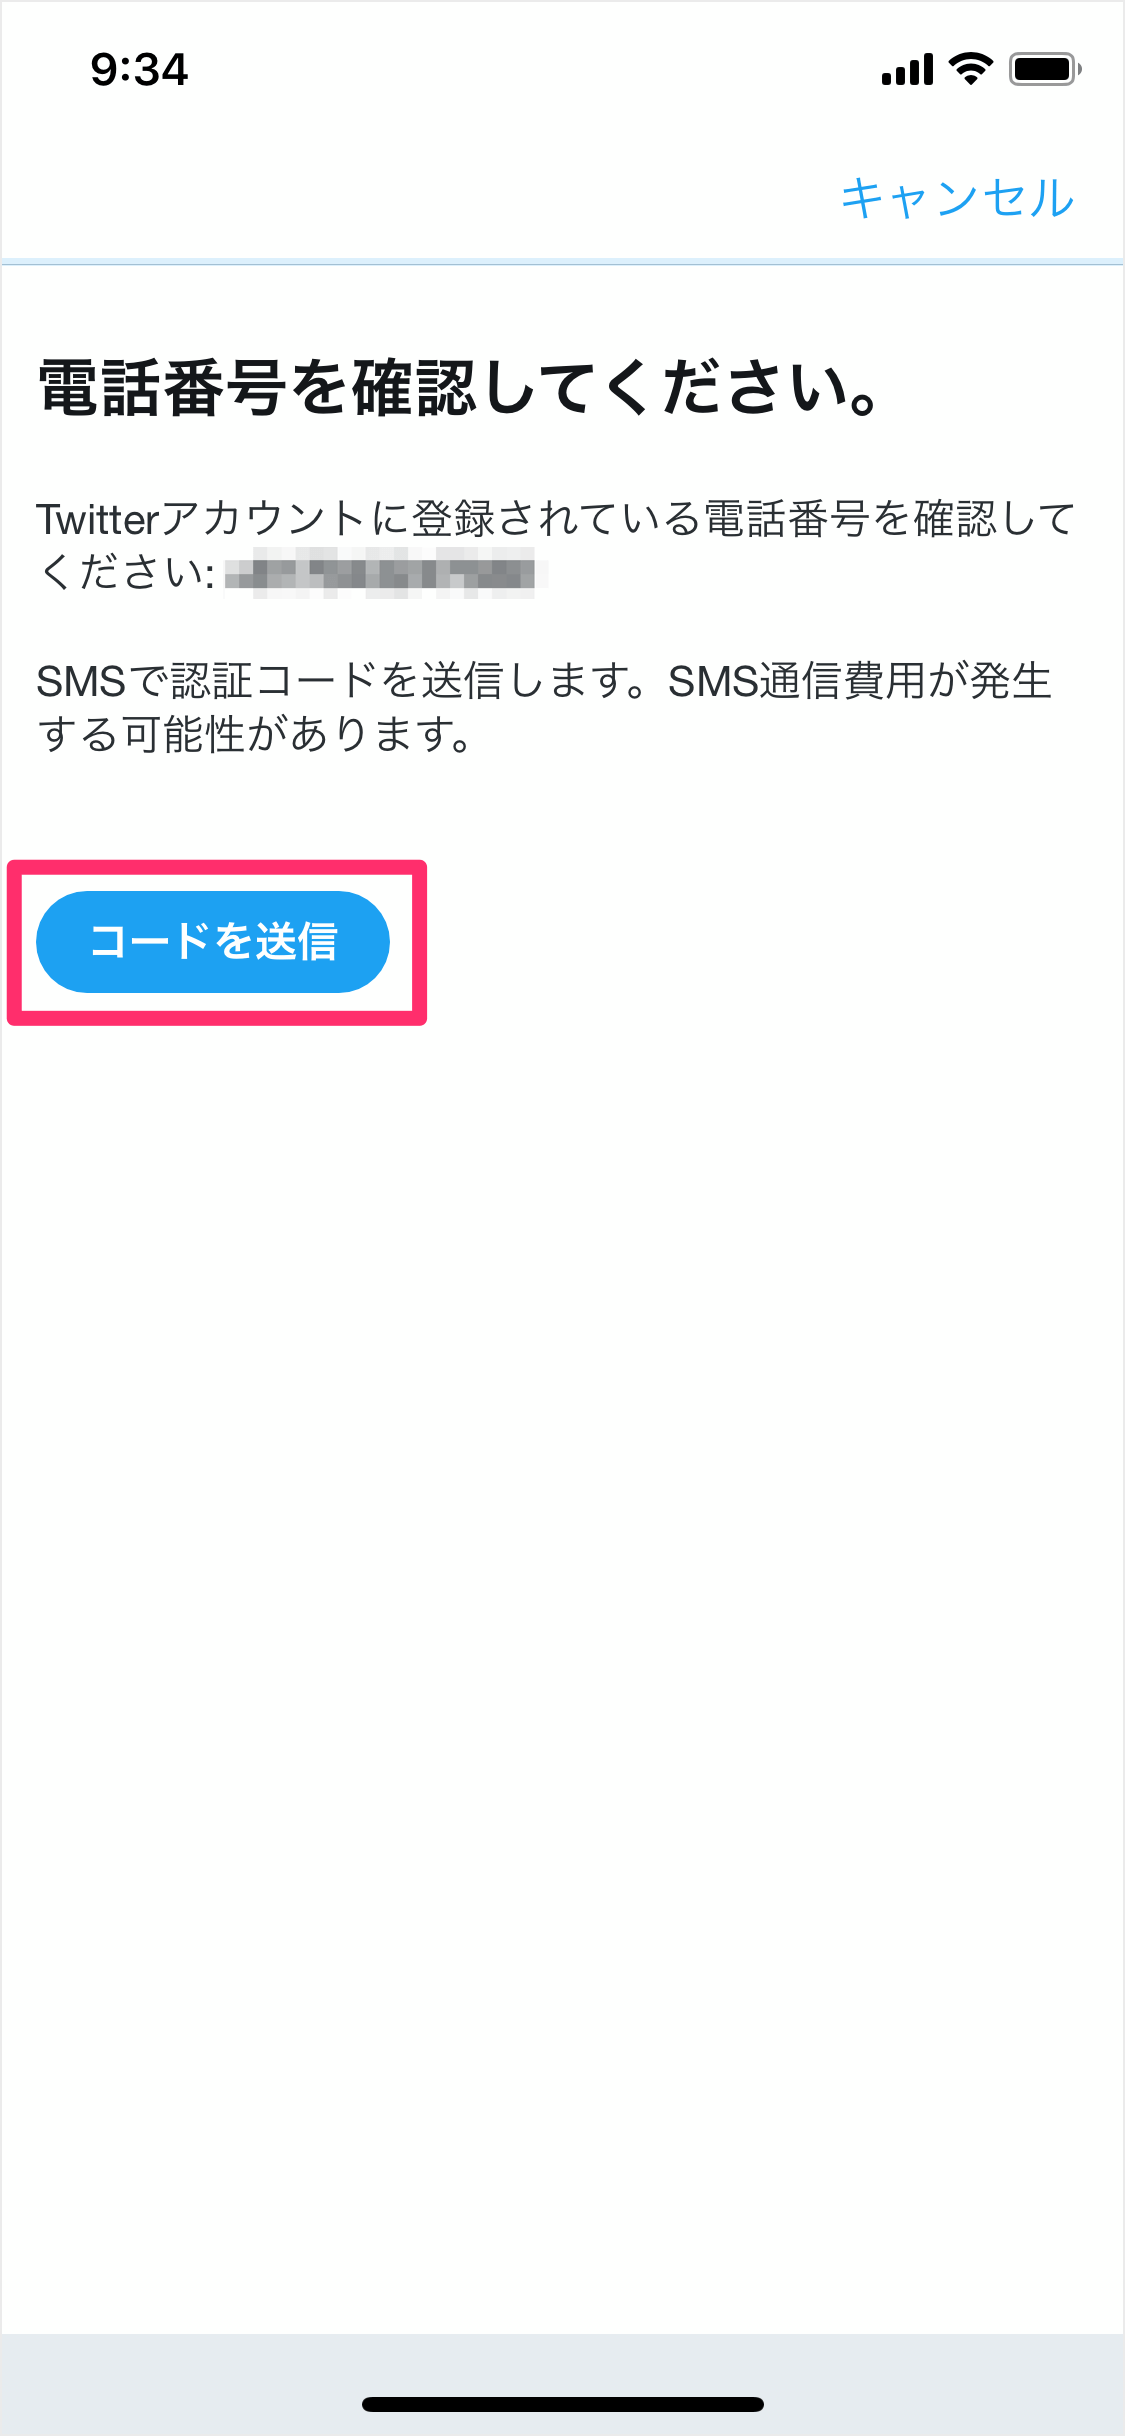
Twitterに登録されている(表示されている)電話番号を確認し
「コードを送信」をタップします。
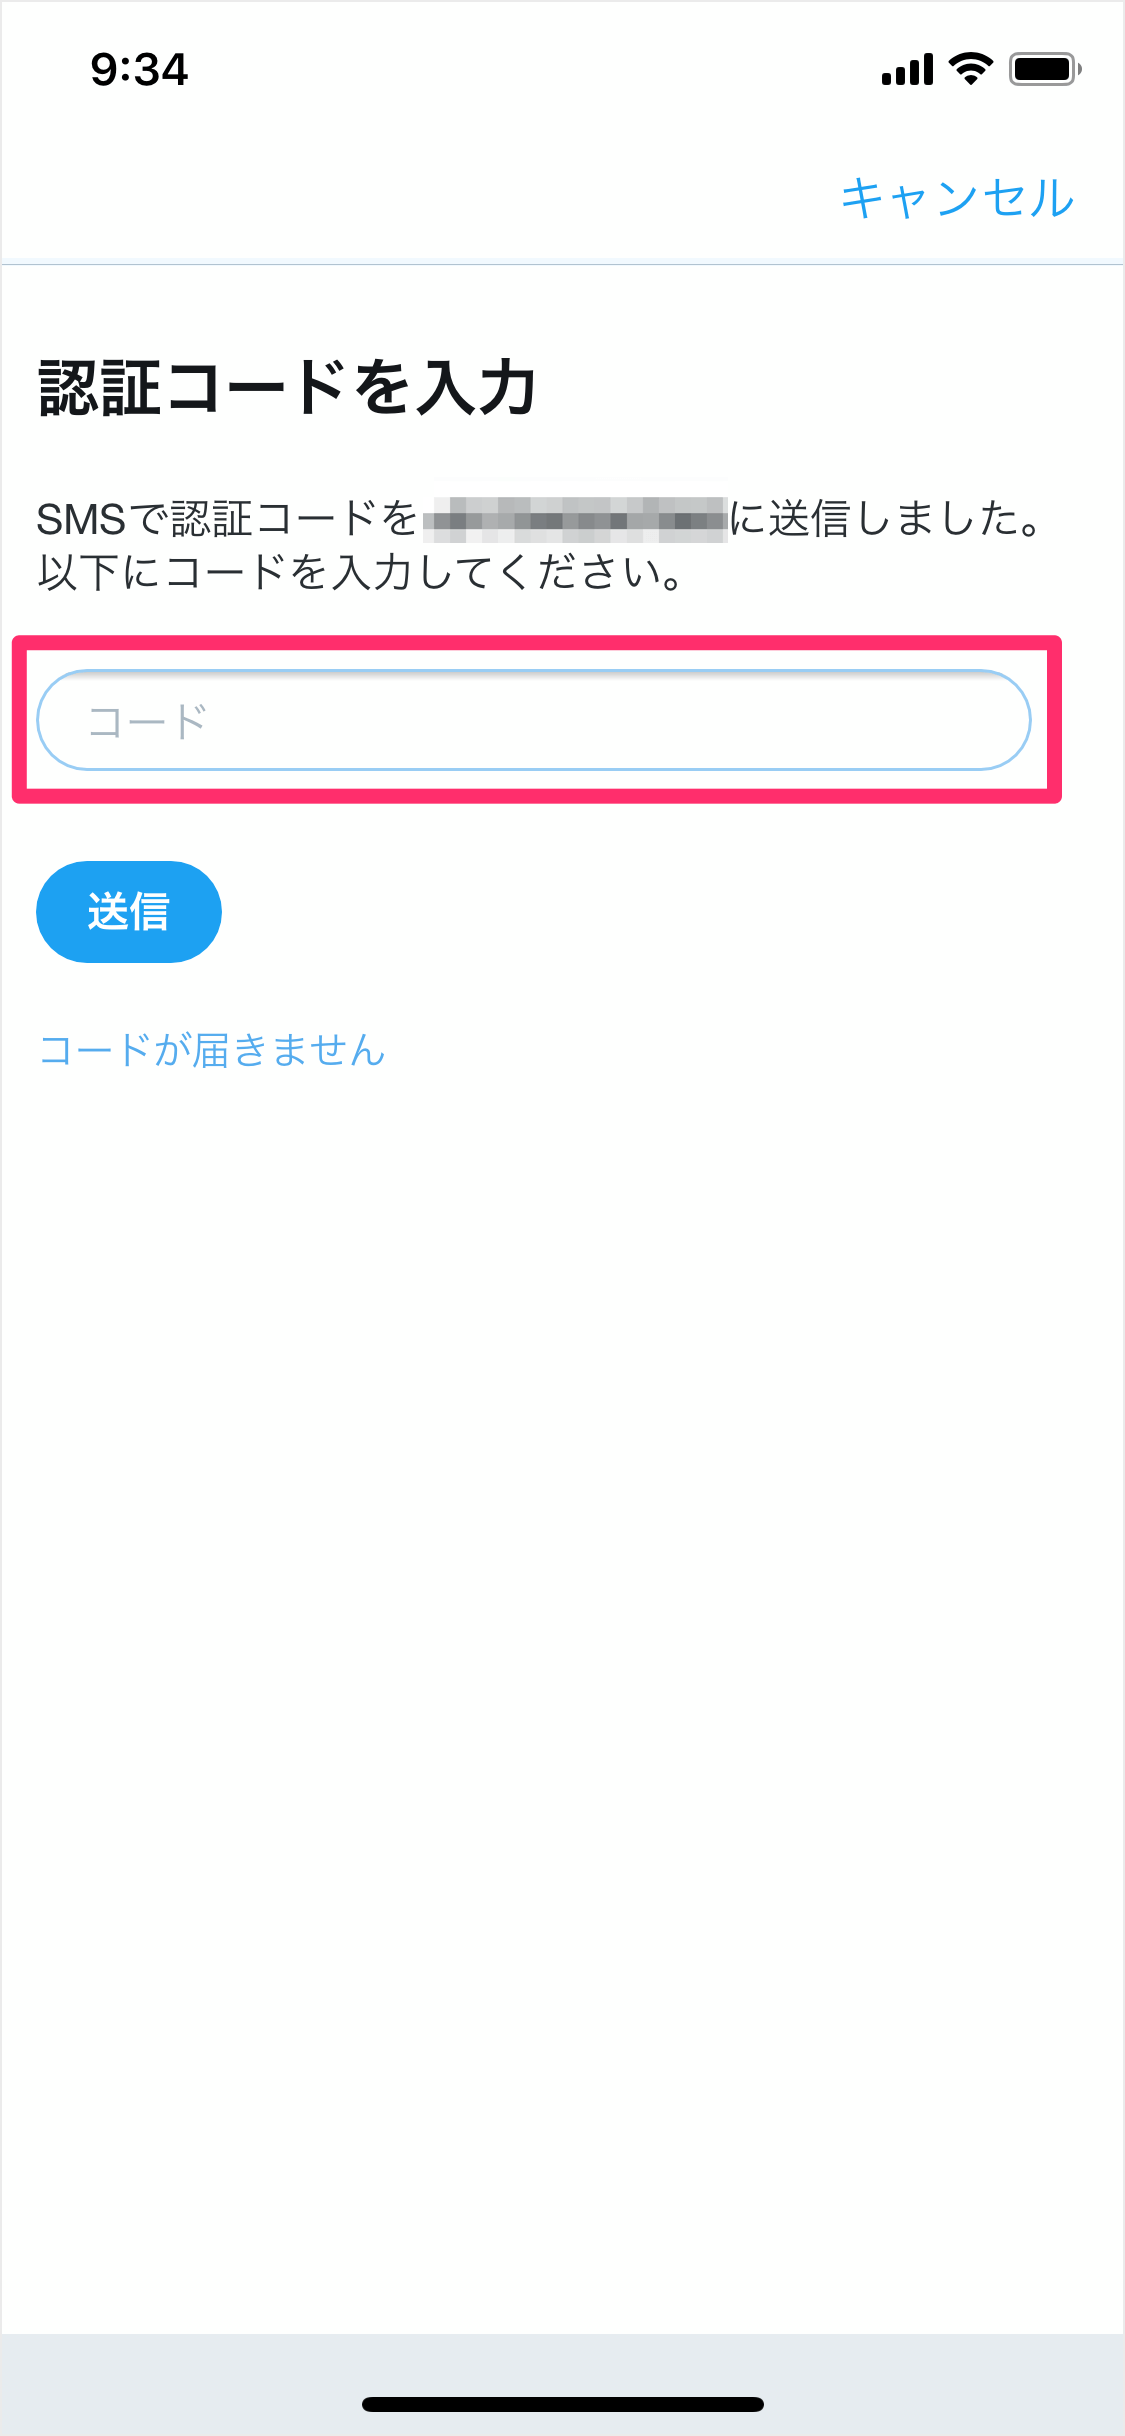
受け取った「コード」を入力し
「送信」をタップします。
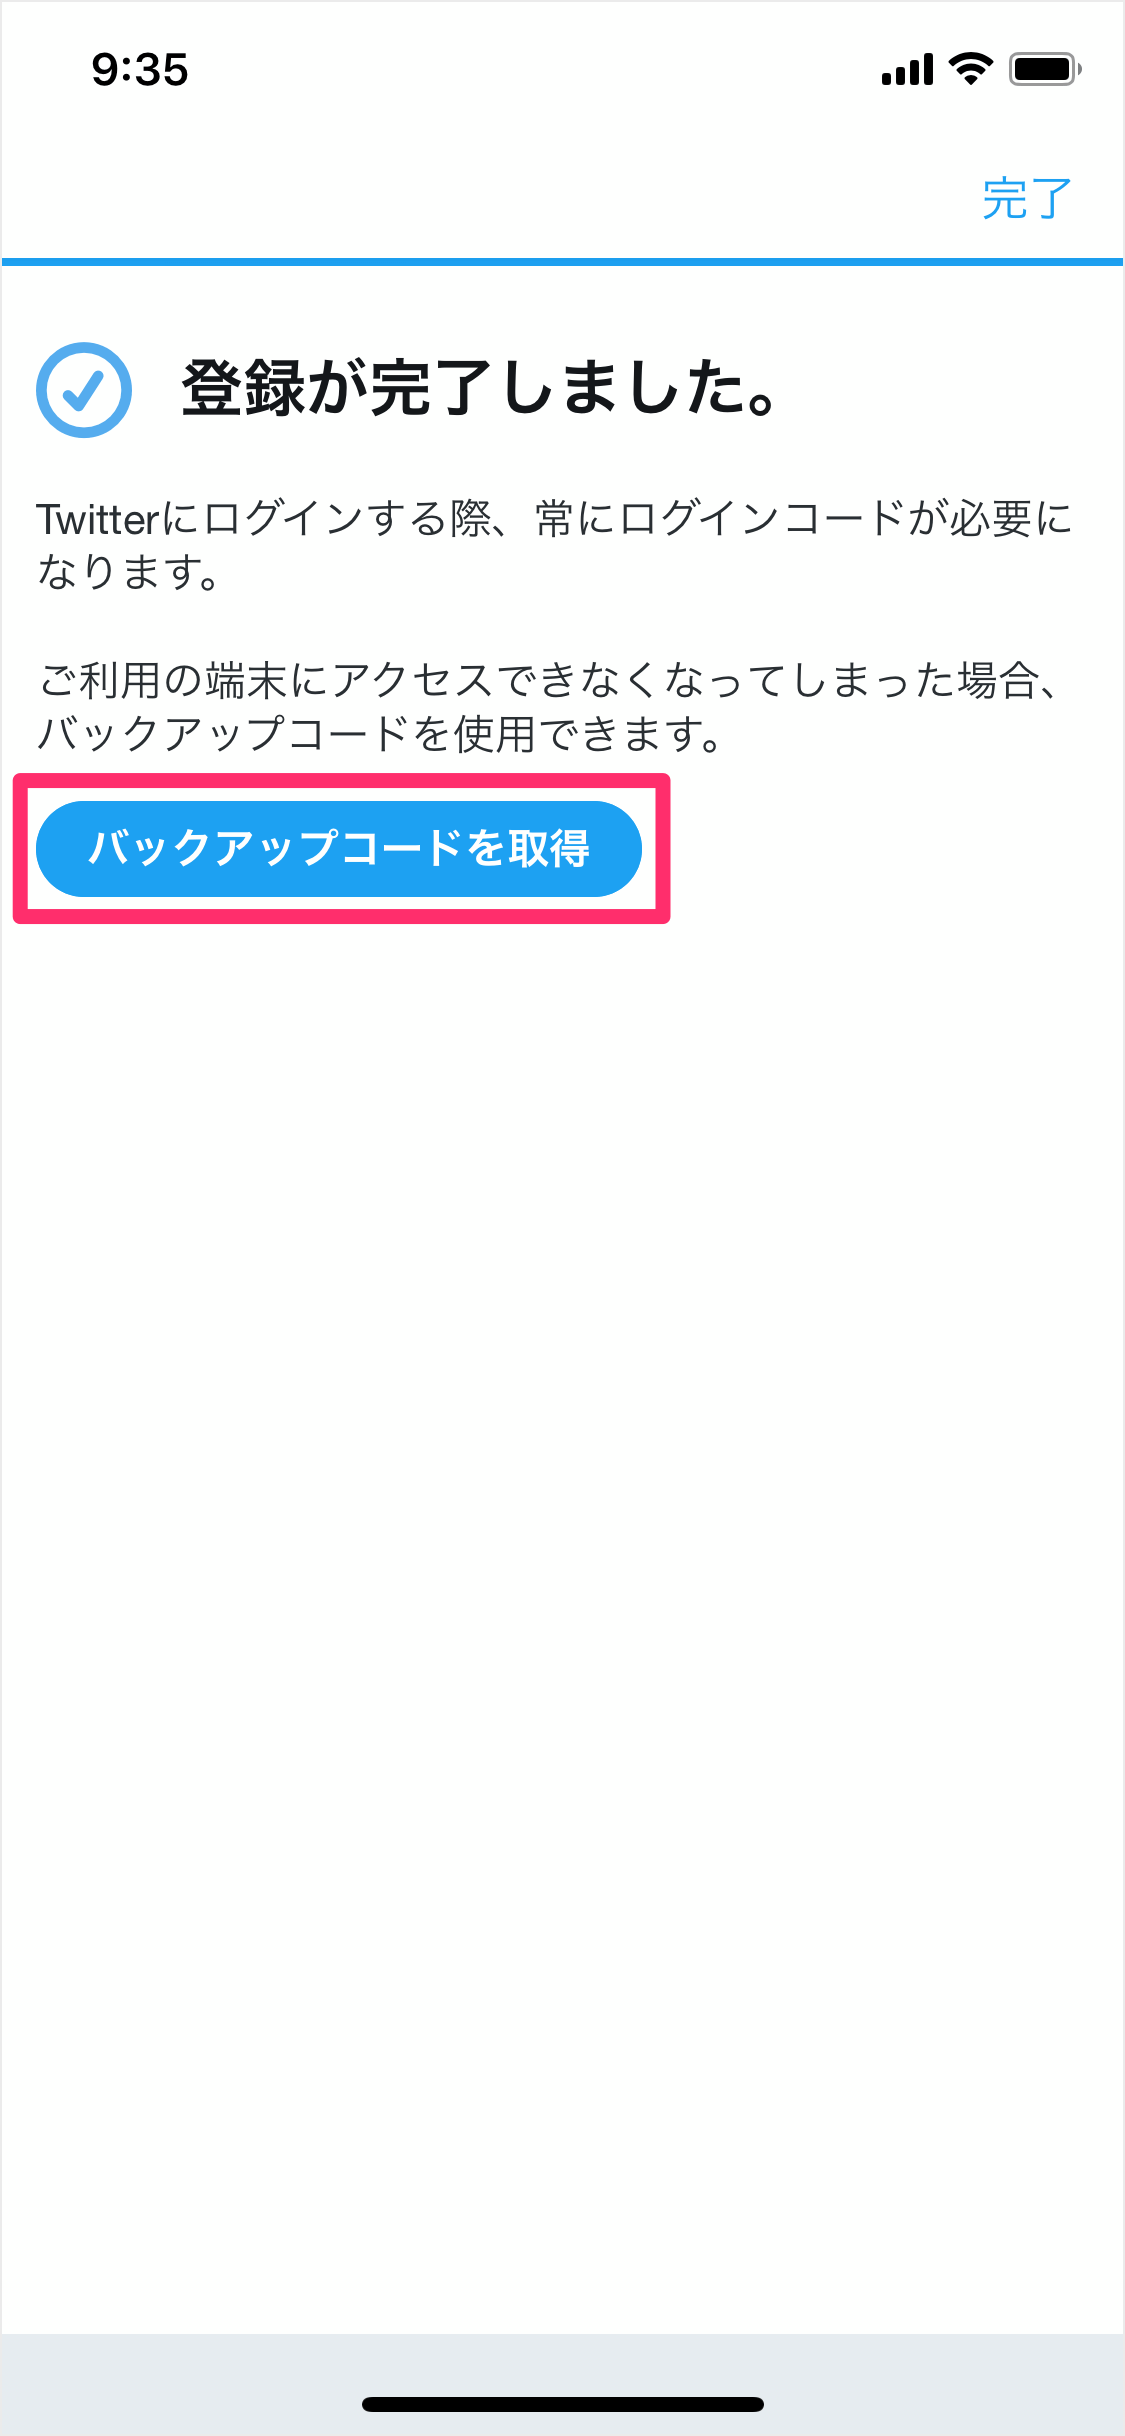
登録が完了しました。
これでログイン認証(2段階認証)が有効になりました。
「バックアップコードを取得」をタップすると

携帯電話を紛失した場合にログインするためのコード(バックアップコード)が表示されます。
スクリーンショットを保存するか、コードをメモっておきましょう。