
Windows 10 スクリーンショットの保存先を変更する方法を紹介します。
Windows 10 では、便利なショートカットキー [Win + ScreenShot] を押すと

スクリーンショットが撮影され、 [スクリーンショット(番号)] というファイル名で次のフォルダーに保存されます。
C:\Users\ユーザー名\Pictures\Screenshotsスクリーンショットの保存先はお好みの場所へ変更することができるので、ここではその方法をみていきます。
スクリーンショットの保存先を変更する方法は?
Windows 10 スクリーンショットの保存先を変更する方法は次の手順です。
-
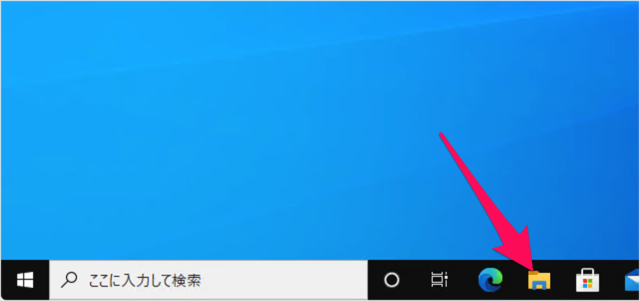
エクスプローラーを起動する

タスクバーから「エクスプローラー」を起動しましょう。 -
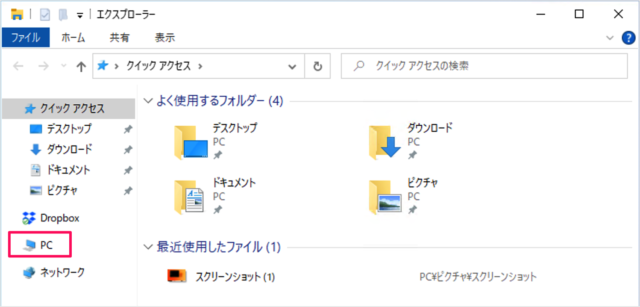
[PC] を選択する

エクスプローラーです。左カラムにある「PC」をクリックし -
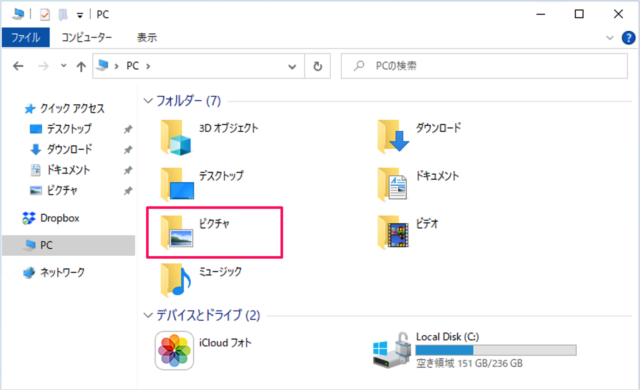
[ピクチャ] へ移動する

「ピクチャ」へ移動しましょう。 -
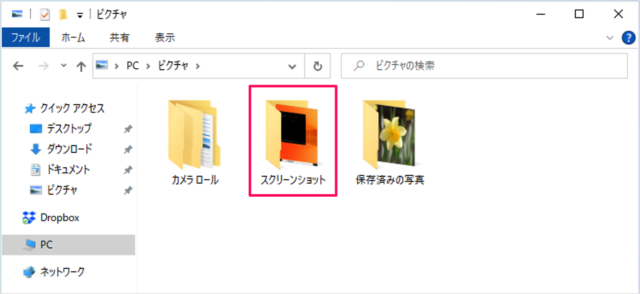
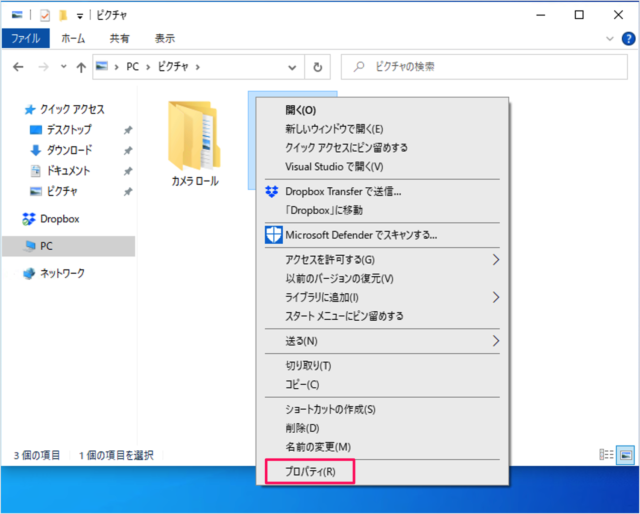
[スクリーンショット] の [プロパティ] を選択する

「スクリーンショット」フォルダーを選択し、右クリックすると
このようにメニューが表示されるので、「プロパティ」をクリックします。 -
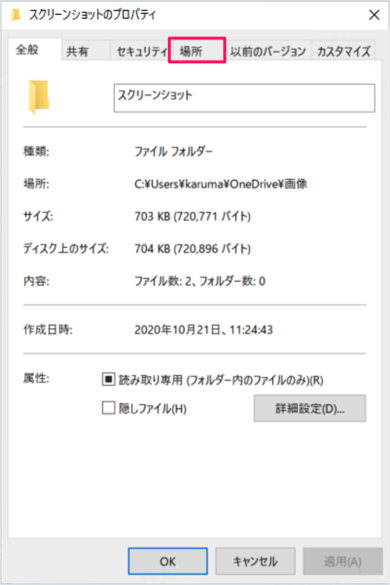
スクリーンショットの保存場所を変更する

スクリーンショットのプロパティです。上部タブの「場所」をクリックしましょう。
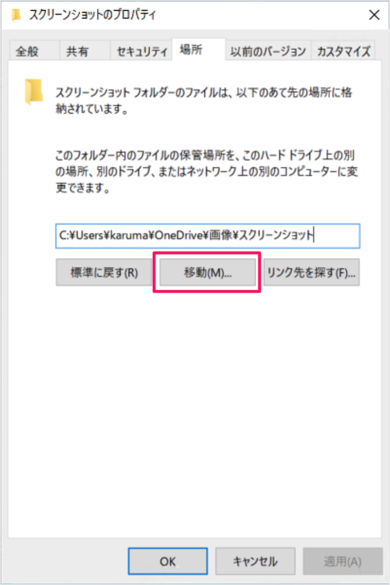
すると、スクリーンショットの保存場所が表示されるので、「移動」をクリックしお好みの保存場所を選びましょう。
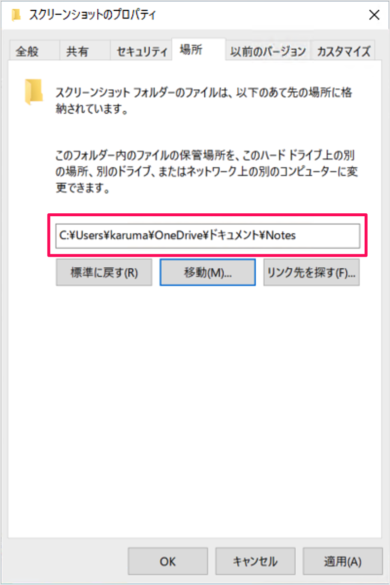
すると、このように保存場所を変更できるので
「OK」をクリックしましょう。
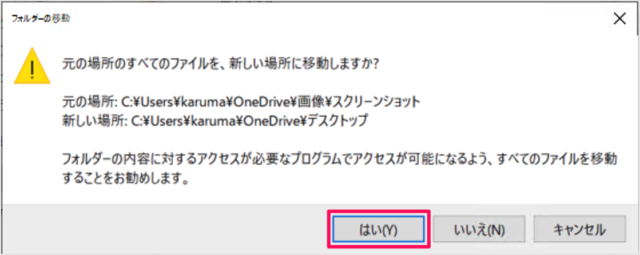
すると、このようなウィンドウが表示されるので「はい」をクリックしましょう。元の場所のすべてのファイルを、新しい場所に移動しますか?
-
変更した保存場所の確認する
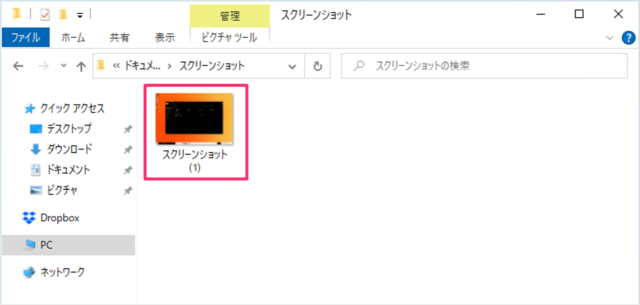
変更した保存場所のフォルダーへ移動してみると

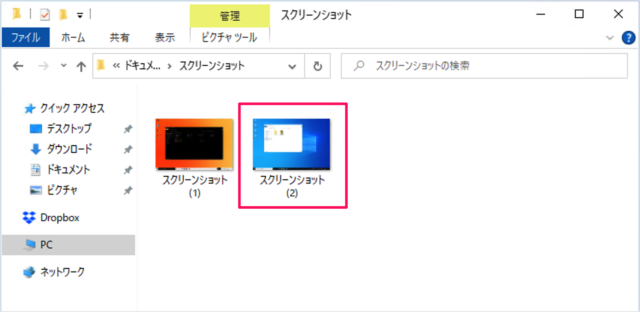
スクリーンショットのファイルが移動しています。ショートカットキー「Win + ScreenShot」を押すと

このように変更した保存場所にスクリーンショットが撮影されます。

スクショなどWindows10には便利なショートカットキーがたくさんあります。Windows 10 のショートカットキーをまとめてみたので、ご参考にどうぞ。