Microsoft Print to PDF を追加・削除する方法を紹介します。
Microsoft Print to PDF は、Windows10から標準搭載されている「仮想プリンター」です。この仮想プリンターで印刷すると紙に印刷する代わりにPDFファイルとして保存することができます。
例えば、Microsoft EdgeやGoogle Chromeで表示しているウェブページなどをPDFファイルとして保存することができます(PDFファイルに変換してくれます。)
ここでは誤ってMicrosoft Print to PDFを削除してしまった場合に! あらためてMicrosoft Print to PDFを追加する方法と意図的に削除する方法をみていきます。
Microsoft Print to PDF を追加する方法
便利なMicrosoft Print to PDFを誤って削除してしまった……そんな場合は次の方法でMicrosoft Pritn to PDFを追加しましょう。同じような作業を2回繰り返す必要があります。
検索ボックス

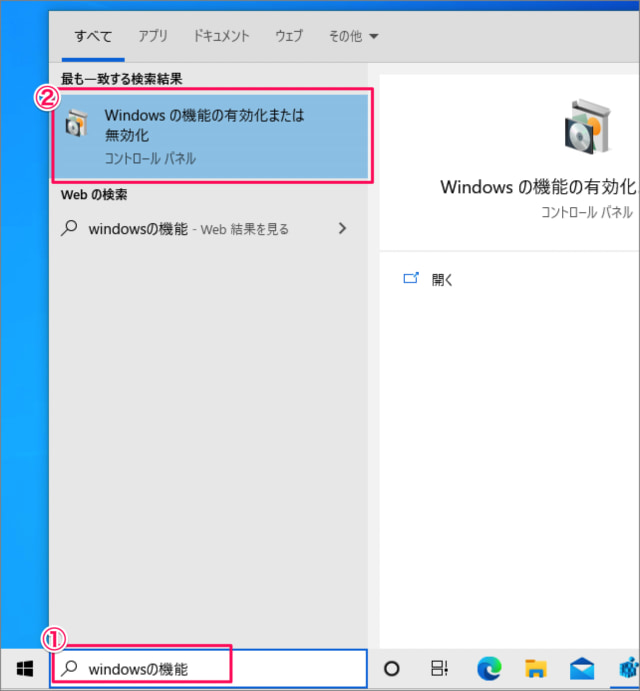
①タスクバーの検索ボックスに「Windowsの機能」と入力し、②「Windowsの機能の有効化または無効化」をクリックします。
Windowsの機能
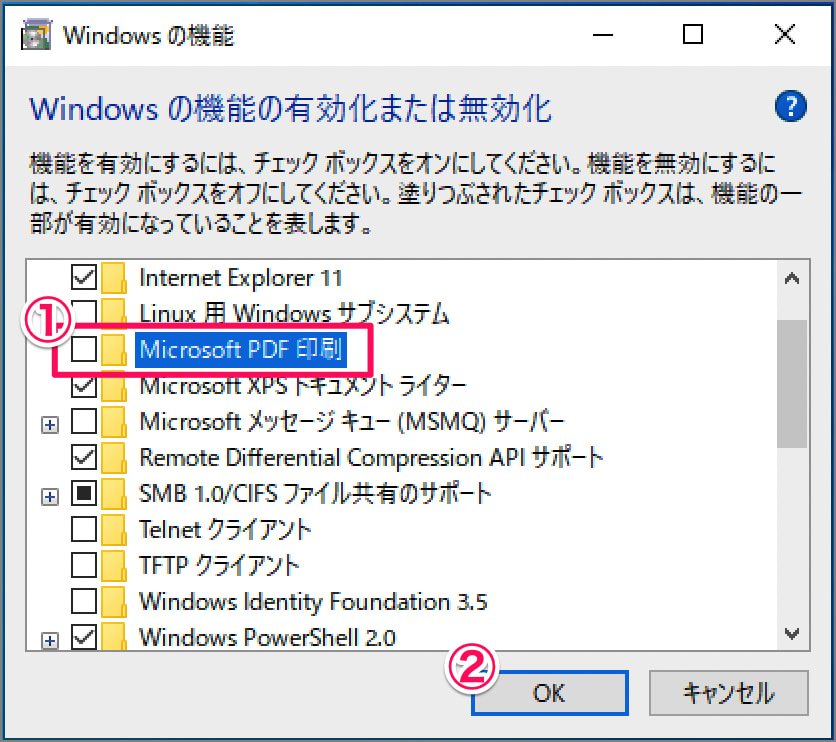
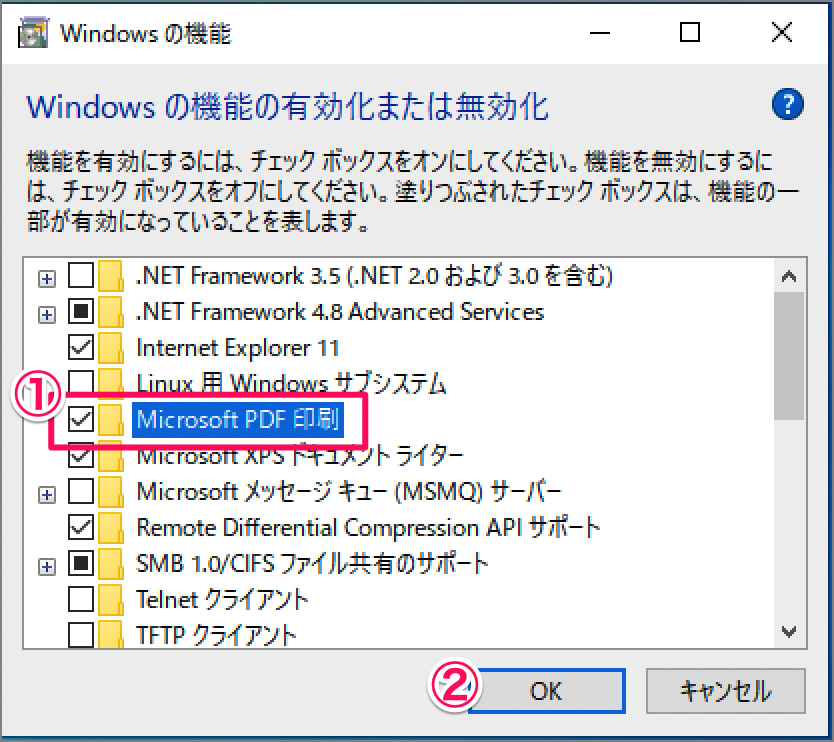
①「Microsoft PDF 印刷」からチェックを外し、②「OK」をクリックします。

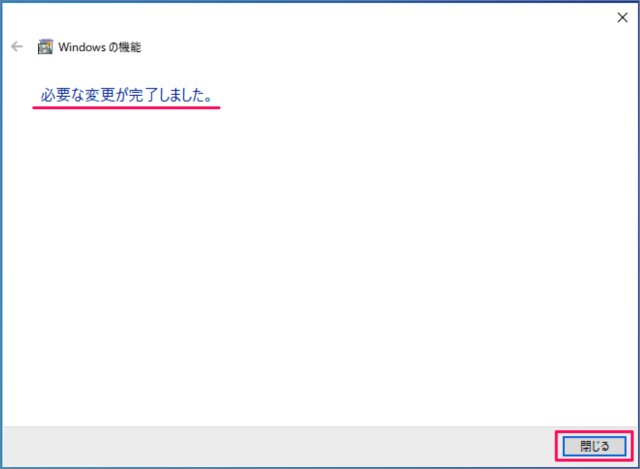
必要な変更が完了しました。「閉じる」をクリックします。
検索ボックス
①タスクバーの検索ボックスに「Windowsの機能」と入力し、②「Windowsの機能の有効化または無効化」をクリックします。
Windowsの機能
①「Microsoft PDF 印刷」からチェックを外し、②「OK」をクリックします。
必要な変更が完了しました。「閉じる」をクリックします。
プリンターの確認
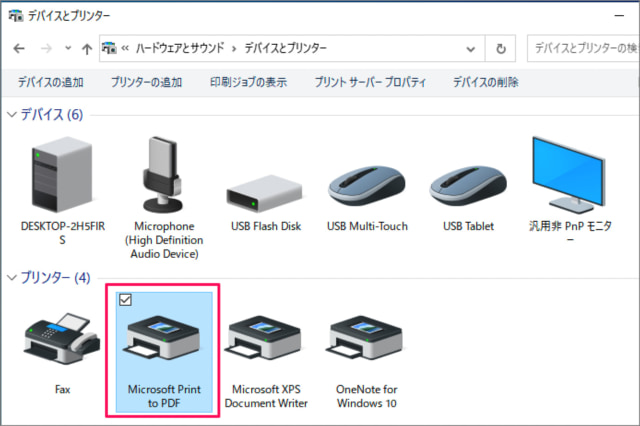
コントロールパネルのプリンターをみてみましょう。「Microsoft Print to PDF」が追加されていることを確認することができます。
※ 仮想プリンター「Microsoft Printer to PDF」は削除できないように設定することもできます。合わせてご覧ください。
Windows 10 プリンターを削除できないように設定する方法
Microsoft Print to PDF を削除する方法
Windowsの設定
「Windowsの設定」から、Microsoft to PDF を削除する方法をみていきます。
次の手順で削除します。
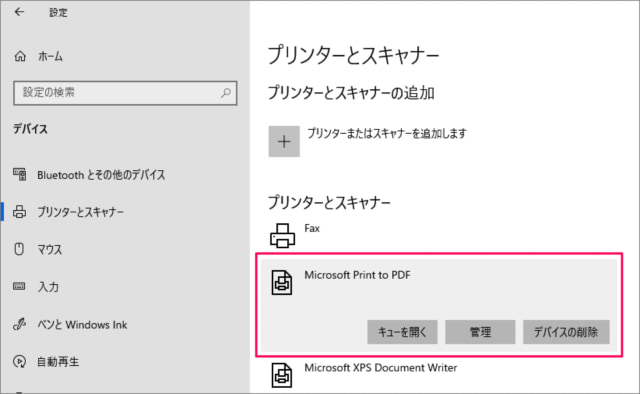
- 「Windowsロゴ」を右クリックし、「設定」をクリックします。
- Windowsの設定の「デバイス」をクリックし、左メニューの「プリンターとスキャナー」を選択します。
- 「Microsoft Print to PDF」を選択し、「デバイスの削除」をクリックし、「はい」をクリックします。
- これで削除完了です。
コントロールパネル
「Windowsの設定」から、Microsoft to PDF を削除する方法をみていきます。

次の手順で削除します。
- 検索ボックスに「コントロールパネル」と入力し、コントロールパネルを起動します。
- ハードウェアとサウンド項目にある「デバイスとプリンターの表示」をクリックします。
- 「Microsoft Print to PDF」を右クリックし、「デバイスの削除」をクリックします。
- これで削除完了です。
コマンドプロンプト
コマンドプロンプトを使って、Microsoft Print to PDF を削除する方法をみていきます。
次の手順で削除します。
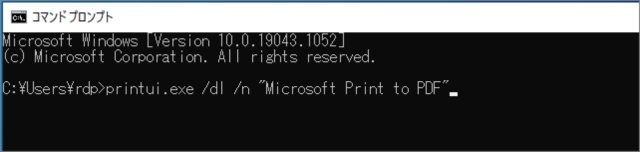
- 検索ボックスに「cmd」と入力し、コマンドプロンプトを起動します。
- 次のコマンド(printui.exe)を実行し、プリンターを削除します。
- コマンドが適切に実行されれば、削除完了です。
printui.exe /dl /n "Microsoft Print to PDF"PowerShell
PowerShellを使って、Microsoft Print to PDF を削除する方法をみていきます。
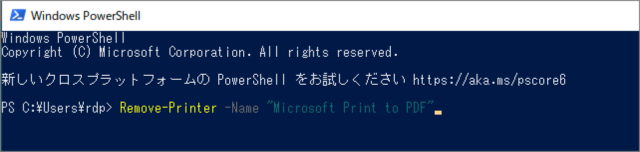
次の手順で削除します。
- 画面左下の「Windowsロゴ」を右クリックし、「Windows PowerShell」を起動します。
- 次のコマンド(Remove-Printer)を実行し、プリンターを削除します。
- コマンドが適切に実行されれば、削除完了です。
Remove-Printer -Name "Microsoft Print to PDF"Microsoft Print to PDF 印刷・保存できない場合
Microsoft Print to PDF で、印刷・保存できない場合はこちらをご覧ください。